Category Archives: Photography Tips

Lenses and Teleconverters – A Comparison with my Canon Lenses

Want your telephoto lens to be a little MORE “telephoto”?  Here is an option to consider.  You could buy a teleconverter. This device inserts between your camera and the lens, and extends the effective focal length of the lens. Most often, you will find these as 1.4X and 2X teleconverters.

As with all things, with the benefit comes some tradeoffs.  You have to be really careful in your selection of a teleconverter and read lots of reviews before purchasing, otherwise you could be really disappointed.

One tradeoff is you lose one stop of light with a 1.4X teleconverter and you lose two stops of light with a 2X teleconverter. Also, depending on the teleconverter, you’ll have varying degrees of degradation in image quality. With some teleconverters attached to some lenses, you might even lose other features like auto focus! So, before you buy, do your homework.

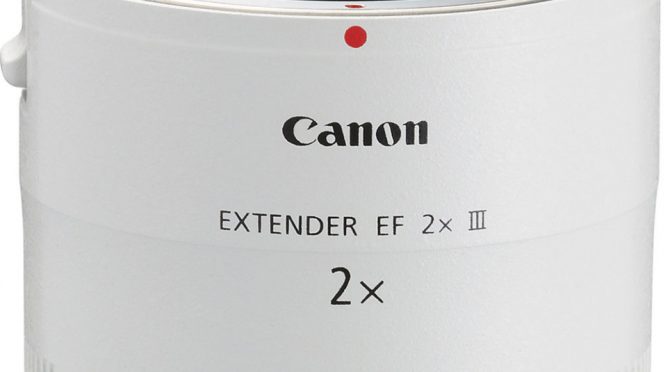
I thought I’d share some observations with a teleconverter I own.  I use Canon cameras and they call their teleconverters “extenders”.  (They just had to be different from everyone else, don’t ask me why.) I own the Canon EF 2.0X III Telephoto Extender for Canon Super Telephoto Lenses.

I happen to own these two Canon telephoto lenses:

I absolutely love both of these lenses. The 70-200 is literally one of my all-time favorite lenses I have ever used over my 40+ years in photography. And the 100-400 is an excellent lens for use in my wildlife photography, for example on our Rocky Mountain Photography Workshops we host in the Summer and Fall.

We shoot with both of these lenses, and sometimes use the Canon 2.0X Telephoto Extender on the 70-200 lens, to extend its focal length to 140-400mm. This really works pretty well.

I would most definitely not recommend you use the 2.0X Extender on the 100-400mm lens though.  That is not a good combination, primarily because the auto focus system will not work, plus the images turn out a bit too soft.  But the 70-200 is quite nice with the 2.0X Extender. If you shoot with the 70-200, you can keep the 2.0X Extender in your camera bag to boost the focal length when you need it without lugging all that extra weight of the 100-400.

Also, if you already own the 70-200, buying the Extender would be the cheaper alternative, rather than purchasing the 100-400.

When you use the 2.0X Extender on the 70-200, you’ll note that it shifts from being an f/2.8 maximum aperture to being f/5.6 (which is two stops down from f/2.8). That’s really not bad at all.  It is comparable to the 100-400 which is also at f/5.6 when you zoom to 400mm.

Let’s look at the two setups side-by-side. The one on top is the 70-200 with the 2.0X Extender. The one on the bottom is my 100-400.

Canon 70-200 with Extender vs 100-400


The overall length is about the same when zoomed to 400mm, although when zoomed down to their lower focal lengths, the 100-400mm is more compact.

Here are some comparison shots, done with these two combinations.

Here is a shot done with the  Canon EF 100-400mm f/4.5-5.6L IS II USM Lens set to 400mm:

Canon 100-400

And here is the same shot done with the Canon EF 70-200mm f/2.8 L IS II USM Lens with the Canon EF 2.0X III Telephoto Extender extending the focal length to an effectively equivalent 400mm:

Canon 70-200 with 2X Extender

I noticed the 100-400 rendered ever so slightly warmer toned images compared to the 70-200 with the 2.0X Extender. I also noticed that the 70-200 at 200mm and adding the 2.0X Extender actually enlarged the image a little more than the 100-400 at 400mm. They were not exactly equal at effectively at 400m.  I was really a little surprised at that.

When I cropped in closer on the two images, I found the 100-400 at 400mm yielded the sharpest results, but still the 70-200 at 200mm with the 2.0X was not bad at all. I consider the two scenarios to not be exact equals, but quite acceptable (enough that I own the 2.0X Extender and I intend to keep it.

Here is the enlarged cropped-in version of  the  Canon EF 100-400mm f/4.5-5.6L IS II USM Lens set to 400mm:

Canon 100-400

And here is the enlarged cropped-in version of the same shot done with the Canon EF 70-200mm f/2.8 L IS II USM Lens with the Canon EF 2.0X III Telephoto Extender extending the focal length to an effectively equivalent 400mm:

Canon 70-200 w 2.0X Extender

So, the bottom line is: I am pleased with my Canon EF 2.0X III Telephoto Extender at least when using it with my favorite lens, the Canon EF 70-200mm f/2.8 L IS II USM Lens! If I want the sharpest shots at 400mm with my Canon lenses, I’d have to go with the Canon EF 100-400mm f/4.5-5.6L IS II USM Lens.

Oh, by the way, make sure if you buy any of these items, note the “II” designations on the lenses and the “III” designations on the Extender. Those indicate different versions of these items.  The “II” versions of my 70-200 and 100-400 are truly wonderful, outstanding lenses with excellent image stabilization. I am totally happy with both of these remarkable lenses.

Happy Picture-Taking!
Kevin Gourley


Share

Use a Variety of Photo Editing Tools!

If you take the time to move beyond camera skills, you’ll discover the amazing and fun world of digital imaging. I encourage you to explore the use of different software tools for adjusting and editing your photographs. Once you become adept at using the various tools available, you will discover the only real limit is your imagination!

Consider the different photo editing tools and plugins as being sort of like tools on a workbench. You wouldn’t want to just own a hammer.  You need a variety of tools all serving a different purpose.

In this example below, I used a mix of Lightroom and Photoshop magic, but then blended in the use of Alien Skin Software‘s “Snap Art” using their Impasto effect, which gives the image a paint brushed on canvas appearance.  The background is imaginary, created with a mix of edits in Photoshop.

Want to learn photo editing skills? I offer private instruction on virtually all topics of photography and digital image editing.

Happy Photo Editing!

Kevin Gourley

Share

Wildlife Photography

Many of you know I love Rocky Mountain National Park, and I love photographing wildlife.  Here are a few important tips that help with wildlife photography:

  • Know where to find the wildlife
  • Know when to find the wildlife
  • Choose times where the light is better
  • Bring the right photographic gear

Whenever you travel to some new place, it helps to ask locals where the best spots are for photographing wildlife. Sometimes you have to look carefully.

For example, can you find the moose hiding behind these trees?  Look carefully.  It is there.

moose

Ok, I was just kidding.  Maybe that’s a bit obvious. 😉 Even so, finding wildlife is a matter of watching carefully. Sometimes the wildlife might actually be right there in front of you and you might not see it unless you stop and just watch and look carefully, looking for any movement. The example above is totally obvious but sometimes it is not so obvious.

In this example below, I’d swear the elk was trying to hide behind a tree. That’s not REALLY what he was doing, but it looks that way. I thought the photo was funny because it looks like a hide-and-seek photo of an elk.  It is really just an elk rubbing his antlers against a tree. Still, it is possible to even miss wildlife standing behind a single tree at times!

elk

The key is to learn where you are most likely to find wildlife, and then go to those places, and watch. Be persistent. You might have to check those places several times before you find wildlife there. Just because big horn sheep were not there an hour ago, does not mean they won’t be there later on.

big horn sheep

sheep

In this photo of a marmot, below. The marmot was in a place where I often have seen marmots in the past.  It was a rocky area with all sorts of little openings and holes where the marmots can seek shelter quickly. I knew if I went to that specific spot, and waited, I would eventually see the marmot pop up, and sure enough, it did!

marmot

Timing is also important, both in terms of the time of day and time of year. Wildlife will be in different places at different times of the day in the Summer vs. the Fall. You might find more success finding some wildlife in the cool early morning hours. As it gets sunnier, they may be more in the shade. On a bright sunny day, it is REALLY easy to miss a dark moose standing in the shady edge of a forest.

Also, make sure you take time to learn how the time of year affects the presence of wildlife. In the Summer, I am likely to see more elk up in the higher altitudes in Rocky Mountain National Park, giving me wonderful opportunities to photograph them against a backdrop of higher mountain scenic vistas.

elk

In the Fall, during “the rut” (mating season), you’ll find herds of elk have moved down to lower altitudes into the meadow valleys, giving you great photo opportunities.  They are different photo opportunities because you will not be having as many shots up on the side of a mountain but still it is a great time to photograph them.

elk rut

You’ll also find wildlife around water. Just exercise caution when an adult moose is with its young (calf).  Keep a safe distance. They can be very protective of their young.

moose

moose

elk

Another way to look for wildlife within a National Park is to use other people’s eyes to help you. When driving down a road, don’t just look for wildlife. Look for cars stopped along the side of a road. That can be an indicator that they have found wildlife!  You don’t necessarily have to be an expert in spotting wildlife.

moose

In some areas, it is commonplace to encounter wildlife strolling into nearby towns and lodging areas. You could spend your day hunting for elk, only to find the elk standing there when you get back to your cabin!

elk

Oh and just a note about timing and safety. Sometimes you might be up in the mountains looking for wildlife and the weather can change quickly. Be careful about that. It is unwise to put yourself in a situation where you get trapped in a sudden thunderstorm in the mountains. People have been killed by making poor choices about their hikes into the mountains with storms approaching.

lightning

Finally, one other aspect of wildlife photography is the light. Part of good wildlife photography is choosing to photograph during the times of day when the lighting is best.  For example, in this shot below, it was taken shortly after sunrise. But that meant I had to get up very early, and drive in darkness for 45 minutes to reach my location just after the sun had risen to get this nice early morning lighting in the higher altitudes of the mountains.  Early mornings and late evenings often provide beautiful lighting for wildlife photography.

It really helps to bring the right photographic gear. I recommend a camera that goes to a relatively high ISO that does well up to 12800 or more. You shouldn’t ever shoot at an ISO that is higher than is needed for a particular shot, but having the ability to use high ISO values allows you to shoot in lower light circumstances which are a definite possibility with wildlife photography.  Otherwise, you might encounter a great wildlife photo opportunity but you just can’t get the shot because there just isn’t enough light.

Also, use a lens that goes to a higher focal length like 300mm or more for a full frame sensor camera, or 200mm or more for a camera with an APS-C or other smaller sensor format. 400mm or 500mm is even better. The longer focal lengths will safely bring you closer to the wildlife.

Of course there is a lot more to wildlife photography than just what I have mentioned here.  You need to manage your exposure settings. The aperture affects depth of field which is an important consideration in nature photography. The shutter affects the freezing of motion, which is also quite important. The freezing of motion is more than just a consideration about capturing images of running wildlife. It is even more so important to ensure your shutter speed is fast enough to freeze any vibrations that could blur the shot when holding the camera.  Also, if your lens/camera has any form of image stabilization / vibration reduction, make sure you use it when hand-holding your camera (but not on a tripod)!

If you need help, preparing yourself to go on some great vacation this Summer, remember I offer private instruction on most any topic in photography.  I currently am teaching numerous people in my private teaching program.

I’m licensed to lead photography workshops in Rocky Mountain National Park in the Summer and Fall. We have a blast on these trips. It is truly an adventure!  We’re totally sold out for both Summer and Fall for 2017, but if you’d like to be added to a waiting list in case there is a cancellation, let me know! Also, if you are thinking about joining us in 2018, let me know now.  I’ll give you the first chance at registering.

workshop

Happy Wildlife Picture Taking!

Kevin Gourley

P.S. I leave you with one more parting shot of moose. (I just love moose. You might even call it an obsession. I know, I am a little weird about that.)

Share

The Best Camera is the One That is With You

I have seen this quote pretty often: “The best camera is the one that is with you.”  It has been attributed to so many different people on the Internet, I am not sure there is one originator of the quote. The point is so very valid though.

I was recently on a fantastic retreat at the 1900 acre H.E. Butt Foundation Camp on the headwaters of the Frio River in the Texas Hill Country near Leakey, TX.

I had my fancy DSLR with me on the trip, but I really didn’t want to take it on my hike up to the top of this cliff.

When I led a group of friends on this hike, I decided to just take my iPhone, and leave behind my DSLR.

It was a great hike, including a 400 foot ascent to the top, shimmying on rocks in some places, and hugging a river cliff edge that included a section of trail that sloped sideways right into the Frio River.  I was glad I just brought my iPhone.

The weather was spectacular. This venture was really about enjoying the outdoors with friends. It was not a photographic expedition. It was a pretty good workout also.

Upon reaching the summit, we were rewarded with a great view. My handy iPhone allowed me to capture photos along the journey as well as this the view from the top:

That’s looking down from the top of the cliff overlooking the camp where we were staying. I was really glad I was able to bring along my iPhone. It was the perfect sized camera.  Since I didn’t want to bring my DSLR, that means my iPhone was the best camera for this because I had it with me!

My wife and I do lots of hikes around Austin and in our neighborhood. If you’d ever like to join us, just let me know! We love hiking with friends!

I hardly ever bring my DSLR with me on hikes, but I always have my iPhone with me. Here are some examples of a few iPhone shots taken while hiking:

There is no ONE type of camera that is perfect for all purposes. Ultimately, the best camera is the one that is with you when you want to take a picture.

Happy Picture Taking!
Kevin Gourley

Share

So You Think You’re Finished

I am a proponent for getting the shot right in the camera as much as possible.  Get the exposure right. Get the depth of field right. Get the shutter speed right. Get the lighting right. The result will be a better photograph!

That doesn’t mean your job is necessarily done after firing the shutter and capturing the image. So much of the fun of digital photography is the step that comes next. Granted it takes a bit of creativity and (even more-so) a mastery of the various software tools available. I highly encourage you to take the time to learn powerful tools like Adobe Photoshop and Lightroom. Explore the various plugins currently available. Push yourself to go beyond just taking the photograph. Use your digital editing skills to make art!

Since you can do so much with a digital photograph to edit and enhance it, or perhaps even totally change it, sometimes it is hard to say “I am finished with this photograph.” The more proficient you become with your photo editing skills,  you will discover new ways to edit your old photographs. You can even combine different photographs taken at different times with different cameras. 

Here are a few examples:

Here is an original image, as shot in-camera. It already is a good starting point. Nice dramatic light.  Nice composition.

The photo really is a good starting point.  I could just crop it a little bit, and it would be fine as-is.  But, when I was shopping recently, I noticed a placemat that looked interesting, so I took a photo of it with my iPhone:

Then, with a little Photoshop “magic”, using layers, layer masks, blend modes, etc., I replaced the background with the placemat, just darkened a bit.

photoshop. post processing, dramatic portrait

The point is, you can create all kinds of variations from an original image and it is a lot of fun just seeing what you can create.  Be creative. Open your mind to use most anything as a possible background.

Use the tools at your disposal, Lightroom, Photoshop, and various plugins to enhance images. Don’t be afraid to combine images shot with a DSLR with images that were shot with an iPhone.

I created one other variation from the same original image. I cropped in much tighter and then used a plugin from Topaz Labs, called ‘Topaz Glow‘.  (At only $69.99, Topaz Glow is a great tool to have on hand.) Here are the results:

topaz labs, topaz glow, plugin, photoshop

Or here is another example. In this case, I started with an image created in my studio during one of the Studio Lighting Workshops I teach. (Actually, ALL of these were shot by me while teaching a Studio Lighting Workshop.)

portrait, dramatic

I then went back through some old photographs I had taken years ago with a different camera while traveling through Austria and Germany. I found an image among those that would work well in merging the portrait above.

With a little Photoshop editing, blending, masking, etc., here is the result:

Here’s one more example. This image was also shot in my studio:

dramatic portrait

I then grabbed this image from one of the photos from my Austria/Germany travels:

Then I combined the two images:

dramatic portrait

Really, once you have taken the photograph, the fun has only just begun.

Here are some of the tools you should check out for photo management, editing, and enhancement:

  • Adobe Lightroom
  • Adobe Photoshop
  • Topaz Labs Software
    T
    hey make a wide range of products for image enhancement and excellent artistic effects. My students get 15% off Topaz Labs products!
  • Alien Skin Software
    They also make a wide range of products for image enhancement and excellent artistic effects. In fact, their Exposure X2 software might be an alternative for you to consider if you just don’t want to use Adobe Lightroom. My students get 10% off Alien Skin products!
  • Google Nik Collection
    A collection of great software for photo enhancement, and it is TOTALLY FREE! Available on Mac or PC.
  • Macphun Luminar
    A powerful photo editor.  Mac only. My students get 10% off.
  • If any of you are experimenting with HDR (High Dynamic Range) photography, make sure you check out:
    • Photomatix by HDRsoft
      Runs on Macs and PC’s. My students get %25 off their products.
    • AuroraHDR by Macphun
      Runs on Macs only. My students get 10% off their products.
  • SLIDESHOWS!
    One other alternative way to have fun with your images is to create a slide show!  Check out ProShow Producer by Photodex (for PC’s). Or ProShow Web which works on any platform.
  • Ready to make PRINTS from your great photographs?
    Check out Color Inc Pro Labs. They do excellent work, plus my students get special discounts!

Want to Learn More About Photo Editing (or Photography)?

I occasionally teach classes on Adobe Lightroom and Photoshop and many other topics. Make sure you are subscribed to my email list so you’ll be notified as I add more classes.

I also offer private instruction on almost all photographic topics. We could set up sessions where I just teach you what you need to know the most, to get you started.

Happy Picture Taking (and Editing)!

Kevin Gourley

Share

Image Stabilization = Sharper Images

All camera brands offer some form of image stabilization. The technology is wonderful! Whenever you are using slower shutter speeds while holding the camera, hand vibration will cause some amount of motion blur, making the image less sharp. In these situations, image stabilization can really help. Images that otherwise would turn out a little soft (unsharp) will be much sharper with image stabilization.

Every camera and lens manufacturer calls this technology something different, adding a little confusion. Canon calls it Image Stabilization. Nikon calls it Vibration Reduction. Sony calls it Super Steady Shot. Tamron calls it Vibration Compensation. It’s all basically the same idea.

The different manufacturers implement this feature in different ways. Some have it built into the camera body, and others build it into the lens. Canon and Nikon build it into their lenses. The catch is, not all lenses have this feature. Generally, lenses that have this feature cost a bit more than ones that do not. I personally believe it is worth the extra cost.

Usually the manufacturer will indicate the degree to which their stabilization will help. For example, they may say a lens offers “3 stops of image stabilization.” To know what is meant by that, you have to consider a basic rule about what shutter speed is sufficiently fast to freeze any motion blur introduced by hand movement/vibration.

That rule says the shutter speed should be at least 1 / focal length when using a camera with a “full frame” sensor. So if you are shooting with a 200mm lens, you should ensure the shutter speed is at least 1/200th second or faster. Or if you are not using a camera with a full frame sensor, such as a camera with an APS-C sensor, then you need to take into account the sensor “crop factor” (typically 1.5X on most Nikons and 1.6X on most Canons with APS-C sensors). That means with that same 200mm lens on a Canon Rebel DSLR with a 1.6X crop factor, is effectively producing images that look like they were shot with a 1.6 X 200mm lens (320mm) and you should really shoot at least 1/320th second or faster.

Now, back to that lens that says it offers “3 stops of image stabilization”. If you are shooting with a 200mm lens they mean you can break that shutter speed rule I mentioned above by three stops. A stop is a photography term referring to the doubling of the light. So, in terms of the shutter speed, “one stop” means making the shutter speed twice as slow, like going from 1/200th to 1/100th.

If you are using a 200mm lens on a full frame sensor camera, you should normally try to shoot at 1/200th second or faster. If the lens offers “one stop” of image stabilization, then you can get away with shooting at 1/100th. If it offers three stops of image stabilization, you can theoretically shoot at 1/25th second! (1/200th -> 1/100th -> 1/50th -> 1/25th). Wow!

Just note that it is probably risky to go that far with trusting the image stabilization to sharpen up a slow shutter speed shot, but it sure helps having that feature when you simply must use a slow shutter speed hand-held, like when shooting in a low light scenario. If it turns out the image stabilization just isn’t getting the job done well enough, that means it is time for you to shift to a higher ISO which will enable you to shoot at faster shutter speeds.

One more note about terminology you might encounter:  Sometimes you might see the term “EV” used instead of “stops.” They mean the same thing. “EV” stands for Exposure Value and technically is the more accurate term when talking about varying shutter speeds. A “stop” normally refers to the aperture values, but when we are talking about shifting shutter speeds by an amount that is the equivalent of adjusting the light by one f/stop, that is said to be an adjustment of one EV. Still, you will find many manufacturers talk about the image stabilization in terms of stops instead of EV’s. It’s all the same.

Also, note that lenses that offer image stabilization have an off/on switch, and some offer more than one mode of operation. Check the manual that came with your lens for more information about its features and any limitations. For example, the reason they have an off/on switch is because when you are shooting on a tripod, you should turn off the image stabilization.  Again, check your manual for more information about that.  Just remember to turn the image stabilization back ON when you are shooting hand-held!

This feature is so important; you really need to make sure you know how to use it!  Using this technology will help ensure you get consistently sharper hand-held shots! It’s a “must use” feature!

Image Stabilizer Example

Share

My Top 6 Lessons Learned in Photography

I was thinking about the various things I have learned about photography over the years. What did I learn?  How did I learn it?

I thought it might be helpful to share some of my insights about my top 6 lessons learned. Most of these things I either learned from other instructors or sometimes from making horrible mistakes. I don’t recommend making horrible mistakes, but that is sure one way to learn a lesson. 😉

Lesson 1
Pay attention to what you are doing and get it right in camera.

This lesson was something I learned a long time ago (like 35 years ago)!  I think it was really beneficial that I started out in photography back in the days of film.  I shot many many rolls of Kodakchrome 64 slide film.

After I took a series of photographs, I had to send the film off to Kodak to be processed.  With slide film, the developed film is then cut into individual photographs that were placed in cardboard mounts and I would have to show the photos using a projector.  So the photograph I saw in the slide was the actual image I created in the camera.  Whether or not I properly exposed the photograph, I would see the results. There was no faking it.  If I did a bad job, my slide was ruined. I had to get it right.

The fact that the results were not immediate (because I had to have the film developed) meant that I really had to pay attention to what I was doing, otherwise I was wasting a lot of money.  As a student in college, I didn’t have much money, so I payed attention.  My meticulous attention to details (because I had to save money) made me a better photographer.

Even in this digital age, it is much better to get your photograph right in camera rather than just leaning on “fixing” the image after you took it. If you start with a well-exposed shot, you will always end up with a superior end result.

kodachrome

Lesson 2
Manage the shutter speed carefully.

Depending on the light available, ISO, and aperture you have chosen, you will end up with some shutter speed value. I learned this the hard way, but I learned it:  If I do not have the shutter speed fast enough, the photo will not be sharp because of hand vibration / movement.  The general rule of thumb for hand-held photography is to make sure the shutter speed is at least 1 / focal length (of the lens). If you are shooting with a 70-200mm zoom lens with it zoomed to 200mm, then make sure your shutter speed is at least 1/200th second. Technically that rule is for a full frame sensor camera. For a camera with an APS-C sensor, you should modify that rule to take into account the “crop factor” of your camera (usually 1.5 for Nikon and 1.6 for Canon).  A 200mm lens on a Canon Rebel would effectively be 200 x 1.6 = 300mm. So make sure the shutter speed is at least 1/300th second.

Many lenses these days (and some camera bodies) have image stabilization that allows you to break these rules a bit.  So the rule is approximate.

You also need to take into account the movement of the subject. If there is a lot of movement of the subject, you may need to use a shutter speed even faster than the rule of 1 / focal length.

Lesson 3
Manage the depth of field.

You are in control of the depth of field through your choice of aperture. The depth of field is the range that appears to be sharp in front of and behind where you focused.  Choose carefully depending on whether you want a deep or shallow depth of field.  A low f/number yields a shallow depth of field. A high f/number yields a deep depth of field. This is something you should think about in every shot you take because you are in control. Don’t let the camera decide for you. It is just a machine. It has no idea what you want unless you tell it, by controlling the aperture.

Lesson 4
Change your perspective.

Sometimes it is good to just stop looking at the world the same way you always see it. Change your position and angle. Mix it up a bit. Look up.  Look down. Look behind you. Raise your camera way up high. Put it down on the ground. Sometimes that change in perspective will lead to a shot you would have missed.

Lesson 5
Light is ultra important.

Pay attention to details about the qualities of light including angle, direction, number of light sources, light ratio, diffusion, reflection, shadows, etc. A photograph is created by light. It is the most important ingredient in any photograph. Better light leads to better photographs. Master lighting techniques and I can guarantee your photographs will improve. That is true whether you are in control of the light using flashes/speedlights or shooting with natural light. You can’t really control the light in nature, but you can come back to a location at a different time of day or time of year and the light will be different.

Lesson 6
Practice, practice, practice.

There is no substitute for practice.  Keep taking pictures.  Assess the results. Make mistakes and learn from them. Just keep shooting. The more you do it, the better you’ll get. Take classes. Learn more. Do more and your photographs will improve. As Henri Cartier-Bresson said, “Your first 10,000 photographs are your worst.”

Yes, there is more to it…

I could keep going, but this is all for now.  Post processing your images (editing on the computer) is also quite important to add the finishing touches to take your photos from “good” to “great,” but it all starts with what you do with your camera. Get that right first.

Happy Picture Taking,
Kevin Gourley

Share

This Has Nothing to do with Photography OR Does It?

Many of you who have taken one of my Photography 101 Workshops know that I believe it is important for us photographers to study different forms of art.  Seek inspiration in music, painting, sculpting, dance, poetry, … all art.

One aspect of art that inspires me the most is when I see someone doing things completely different, coloring outside the lines, thinking outside the box, or however you want to put it.

Watch the video and then think about YOUR art.  What might you do DIFFERENTLY? What might you CREATE using an approach completely different from everyone else?

I love the creativity behind this endeavor described in the video, even though it really has nothing to do with photography.

Be creative. – Be different. – Be you.

Happy Picture Taking!

Kevin Gourley

Share

The Man with the Crooked Nose

I chose this article title because I thought it might attract your attention, mainly out of curiosity.

The man I am talking about is Ansel Adams. He lived 82 years and had a major impact on the art of photography, and yes, he had a crooked nose.  If you search on Google, you’ll find photos of him, and you’ll see, sure enough, he indeed had a crooked nose.

How did that happen? Well, as the story is told, he was injured in the 1906 San Francisco earthquake when he was a little boy.  An aftershock threw him into a garden wall, and his broken nose was never set properly, so it remained crooked the rest of his life.

He started experimenting with photography when he was around the age of 14, following a trip to Yosemite National Park. Over many decades that followed, he perfected his craft of photography and made major contributions to the art and science of photography with a passion to create outstanding images.  His photographic work is known around the world.

I thought I’d share a few quotes by Ansel Adams.  I figure his insights are way more important than mine:

  • “Sometimes I do get to places just when God’s ready to have somebody click the shutter.”
  • “You don’t take a photograph, you make it.”
  • “There is nothing worse than a sharp image of a fuzzy concept.”
  • “A good photograph is knowing where to stand.”
  • “To photograph truthfully and effectively is to see beneath the surfaces and record the qualities of nature and humanity which live or are latent in all things.”
  • “Some photographers take reality … and impose the domination of their own thought and spirit. Others come before reality more tenderly and a photograph to them is an instrument of love and revelation.”
  • “The only things in my life that compatibly exists with this grand universe are the creative works of the human spirit.”
  • “Twelve significant photographs in any one year is a good crop.”
  • “The single most important component of a camera is the twelve inches behind it.”
  • “Photography is more than a medium for factual communication of ideas. It is a creative art.”
  • “A great photograph is a full expression of what one feels about what is being photographed in the deepest sense, and is, thereby, a true expression of what one feels about life in its entirety.”

Most definitely, he was attentive to technical details, perhaps best known for his work with Fred Archer on the development of the “Zone System” for determining optimal film exposure, developing, and printing for perfect rendering of all image tonal values from black to white and all levels (zones) in between. I worked with the Zone System in my earlier years when I spent countless hours in the darkroom.

As I look over the many quotes by Ansel Adams that people post online I am grateful they keep his insights alive for the benefit of us all, but one thing stands out to me.  Most of his greatest insights were about how we see the world, how we appreciate the art of photography, and how we appreciate the beauty of the world around us, and even about how we FEEL.

When you look at the technical details involved in developing the Zone System, we see he was surely great at the technical aspects, but from what I can tell from his many quotes is that the “technical” is secondary to the “art”.  Or as he said, “There is nothing worse than a sharp image of a fuzzy concept.”

As many of you know, this is one of my concerns, that in this age of high tech photography, we can get all geeky about it and focus on fancy gear and miss what is most important, the art.

It is sometimes easier to obsess with “technically perfection” yet ignore the art aspects. We must always remember to focus on the art of photography: composition, emotion, light, shadow, mood, story telling, and so much more.  If we just focus on the technical stuff, we’ve missed out on what is really important.

Focus on what is important.  

By the way, it doesn’t matter that Ansel Adams had a crooked nose.

Happy Creative Picture Taking

Kevin Gourley


Share

Rainy Day Photography

It’s tempting to put away your camera on a rainy day. I encourage you to photograph the rainy days. There is something about the “mood” of a rainy day that is expressed well in art. Also the colors of nature are richer when it rains.  The greens are greener, the browns darken.

While we withdraw from the rain, nature embraces it as the giver of life. Wait for the rain to pass, but do so with your camera in hand.

Photograph the rain. Photograph the water droplets on flowers and leaves.

If there is lightning, that can add an element of visual excitement as well.

If you’re lacking inspiration on what to photograph in the rain, here’s an idea: Give yourself a project!  Search online for quotes about rain, and then try to create a photograph that “fits” with the quote.  Here are some quotes you might use:

  • “Some people walk in the rain, others just get wet.” – Roger Miller

  • “For after all, the best thing one can do when it is raining is let it rain.”  – Henry Wadsworth Longfellow

  • “The way I see it, if you want the rainbow, you gotta put up with the rain.” – Dolly Parton

  • “Into each life some rain must fall, Some days must be dark and dreary.” – Henry Wadsworth Longfellow

  • “Let the rain kiss you. Let the rain beat upon your head with silver liquid drops. Let the rain sing you a lullaby.” – Langston Hughes

  • “Rain is grace; rain is the sky descending to the earth; without rain, there would be no life.” – John Updike

  • “I always like walking in the rain, so no one can see me crying.” – Charlie Chaplin

Happy Picture Taking

Kevin Gourley

Share