Category Archives: Photography Tips

Left Brain / Right Brain

The left and right sides of the brain work together but each side has some specialized functions.

Left Hemisphere:

  • Language: Primarily responsible for language processing, including speech production, comprehension, and reading.
  • Logic and Analysis: Often associated with logical reasoning, analytical thinking, and mathematical skills.
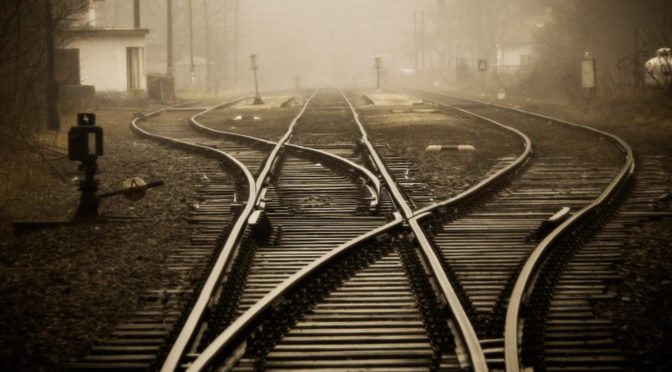
  • Sequential Processing: Tends to process information in a linear, step-by-step manner.

Right Hemisphere:

  • Spatial Processing: Excellent at spatial awareness, visual-spatial skills (like recognizing faces), and navigation.
  • Intuition and Creativity: Often linked to creativity, imagination, and intuitive thinking.
  • Emotional Processing: Plays a significant role in emotional processing and recognition.
  • Holistic Processing: Tends to process information in a more holistic and intuitive way, focusing on the “big picture.”

When we consider photography, it is most definitely a combination of science and art, and both sides of the brain are involved (well, that’s true with everything).

In terms of how we approach photography, growing our skills, and discovering our unique artistic expression, we should be mindful that we need to master both the art and science aspects.

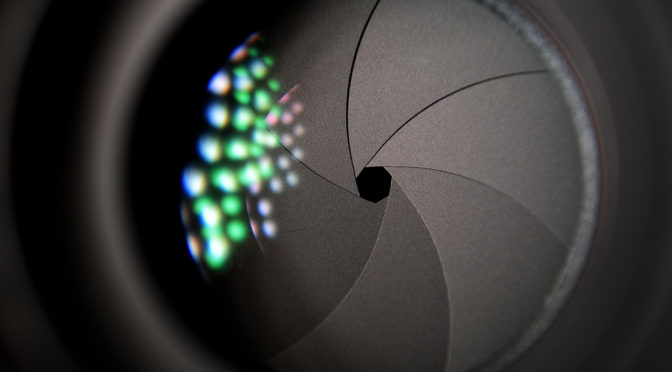
It is pretty common to confront the technical aspects first. There is so much to learn, involving a bit of math, and numbers, f/stops, shutter speeds, ISO, depth of field, white balance, exposure modes, and so much more. But we are really missing out if we only approach photography from the technical side. You can take a perfectly exposed photograph, all the settings are correct, technically “perfect” yet lacks in much artistic value, certainly no emotional connection between the artist and the viewer of their art.

We must also approach photography from the aspect of its visual artistic expression. How does the photograph you created lead the viewer to experience certain emotions? How does the viewer feel about the photograph? How does the viewer relate to the subject matter? Is it a creative expression of a subject or concept? Does it spur the imagination of the viewer?

Delving into the artistic side of photography goes way beyond f/stops and shutter speeds, and actually is where photography becomes most interesting.

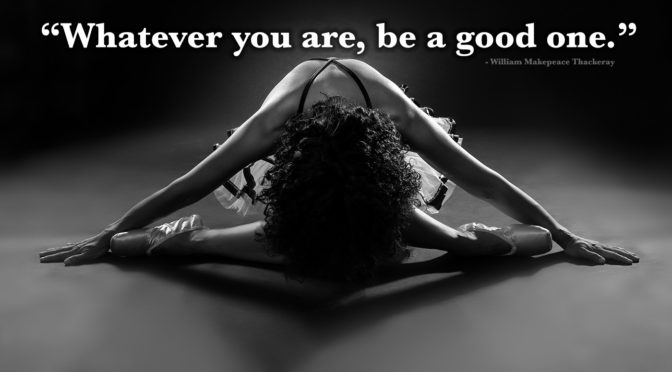
So, I just say all this to remind you that the artistic “side” of photography is every bit as important as the technical side. Strive to grow in both aspects. Pursue unlocking your own unique creativity.

As renowned academic, researcher, and storyteller, Brene Brown says,

“Let me sum up what I’ve learned about creativity from the world of Wholehearted living and loving: “I’m not very creative” doesn’t work. There’s no such thing as creative people and non-creative people. There are only people who use their creativity and people who don’t. Unused creativity doesn’t just disappear. It lives within us until it’s expressed, neglected to death, or suffocated by resentment and fear. The only unique contribution that we will ever make in this world will be born of our creativity. If we want to make meaning, we need to make art. 

Kevin Gourley

P.S. If you get a chance take this class I intermittently offer:

Photography: Finding Your Way – Creativity and Inspiration Workshop

Share

What Exactly Are f/stops?

Sometimes folks have asked why we describe the aperture value in “f/stops” and it seems like weird nomenclature that may not make sense. Actually it makes total sense once you know what it means.

Let’s say you want to know the size of an aperture. We answer with some f/stop number. But exactly how big IS the aperture diameter in millimeters? The f/stop is the answer. “f” is the “focal length”. The aperture size is the focal length divided by the number.

The aperture size (in millimeters) for f/4 is the focal length divided by 4. Let’s say you have a 100mm lens at f/4 What is the actual size of the aperture in millimeters? 100mm/4 = 25mm. How about a 100mm lens at f/2. What is its actual aperture diameter? 100mm/2 =50 mm.

That also explains why longer telephoto lenses that go to lower f/stop values are larger and more expensive. It’s because it takes a larger diameter glass to implement an f/2.8 lens vs an f/4 or f/5.6 lens. If you have a 400mm lens at f/2.8, its aperture diameter would have to be 142.9mm which is quite large (and expensive)! A 50mm lens at f/2.8 would only need to be 17.9mm in diameter.

Now, you know! 🙂

Share

Think Fast and Slow Down

Here’s a piece of advice that may sound contradictory. Depending on the type of photography you are doing, your success will improve if you think fast and slow down.

Think Fast

What do I mean by this? What I really mean is to practice, practice, practice and get to where you just immediately know what settings to use for exposure, focusing, and a zillion other options. There’s a lot to think about, enough to be overwhelming if you are just learning to use your camera.

Once you have used your camera enough you’ll just immediately know what settings to use. You can “think fast” and be ready to capture that next great shot. For wildlife photography, you sometimes have to think fast because that photo opportunity might just be a fleeting moment.

But what about in portraiture? How does this apply? One could argue that you should think slowly, and think through the settings you are going to use. And that’s valid. But in another sense, if you are fully comfortable in adjusting camera settings you can “think fast” in terms of adjusting settings, and instead devote more of your time interacting with the person(s) you are photographing. Portraiture is more about the interaction between the photographer and the subject and the more you can minimize the time spent on distractions about camera settings, the better. Otherwise, the camera sort of “gets in the way” of the photographic process.

Slow Down

Here I was just talking about being fast, and now I am saying you should slow down. What’s with that?? Well, I am just thinking about the impact of digital photography on our ability to take a LOT of photographs in a short period of time. In wildlife photography, for example. I think we are probably all guilty of taking way too many photographs of that bird or animal, as if the real goal is quantity over quality. So, slow down and watch for those really optimal moments where “now” is the time to take that shot. It’s a matter of pacing and critical judgement of how many shots you are going to take.

Being a photographer with a lot of years of experience (a kinder way of saying I am “old”), I started out shooting with film cameras. Back then, with film cameras, you really had no choice but to slow down and make your shot count. There would be NO way, you would shoot 500 photos of an animal with film, so this required us to shoot sparingly. But with digital photography, we could easily come away from a day’s work of shooting wildlife with a thousand or more shots. Remember, we want quality, not quantity. Later on, when going through your 1000+ shots, you’ll pay the price of having the tedious task of picking out the best shot.

Similarly, with portraiture, you are usually looking to create that perfect shot, not a few hundred photos of your subject. S-l-o-w down. Don’t just shoot a bunch of photos. Interact with your subject. Don’t hide behind your camera messing with settings. Be fully “present” in your interaction with person. Do what you can to bring out the best in them, reflecting a bit about their personality, and a genuine smile.

The Blue Heron

I remember back to a time, many years ago where I was leading a workshop and we noticed a blue heron perched on a log on a shoreline of a river. Several in the group were taking picture after picture of the heron as it just sat there, not moving. So they definitely would have won a prize for the greatest quantity of photographs of that heron.

I encouraged them to wait and eventually it would take off, and THAT would be the shot to get. I urged them to have all their settings on the camera ready to go, and especially make sure they have their focusing set where they’d get a sharp shot of the bird, and have an adequate shutter speed to freeze movement of its wings and adequate depth of field through their aperture choice.

I had prefocused on the bird (actually in manual focus mode, so I was ready to go). [This was before the days of the more advanced focusing modes of today.] Anyway, we were all standing there waiting for the heron to take flight, and talking, but I encouraged them all to watch and be ready. Some were tired of keeping the camera pointed at the heron so they had their cameras by their sides. Then, in a sudden burst of movement, the heron raised its wings and took off. In that brief moment, I swung my camera up and fired. All my camera settings were ready. In that sudden moment of activity, I was ready and I got the shot, while everyone else was scrambling to get their cameras pointed at the bird and focusing and making adjustments where there was NO opportunity to make adjustments. The thinking had to all be done prior to the bird taking flight. So this is just an example of thinking fast and then getting the shot. I didn’t need a hundred shots of that heron just sitting on the log. I slowed down and just waited for the ONE shot I wanted.

Practice

If you are new to photography, I encourage you to know your camera and practice using it in various settings. Even practice the process of quickly changing your camera settings. You will find there are moments where your speed in making setting changes will mean the difference of “getting the shot” or “missing the shot.”

Most Important Component of a Camera

That great photographer, Ansel Adams, once said “The single most important component of a camera is the twelve inches behind it!” That is so VERY true. We are tempted to think if we just bought a more expensive camera, all our photographs will be better. What is more important is YOU and how well you know your camera. Improve your skills, and your photographs will improve.

I Can Help

I offer all kinds of classes to help you with your photography, plus I have a lot of students choosing to go with my private instruction where we can focus our discussion on your specific needs at timeframes that best fit your schedule.

Happy Picture Taking!
Kevin Gourley

Share

Learn to Ask the Right Questions

I was just thinking about some of the many lessons I’ve learned in my years as a photographer. One thing I have learned is to be particularly careful in making sure I am asking the right questions.

We always see tons of ads by all the various companies who make cameras, and lenses, and other gear. Of course, the photos used in the ads are usually amazing, and the implication is that if you buy their camera or lens or whatever, your photos will suddenly be wonderful. Or, you might get the feeling “if I just had more megapixels, my photos would be so much better.” Or, if you just purchased this brand of lighting, all your portraits will be as good as this shot of this gorgeous professional model.

We all can fall into this trap. I have noticed on so many social media posts or photography blogs or forums, someone will post this amazing photo, and people will immediately ask “what camera did you use?” or “what lens did you use?” Or maybe they’ll ask what shutter speed, aperture, and ISO was used.

All of this may be somewhat relevant, but often we end up asking the wrong questions, and that my friends, is part of the lesson to learn. The real key to improving our photography is to ask the right questions. If you do that, and get helpful answers, your photography will improve way more than buying that one specific camera or lens or brand of lights.

Here are some example questions, that often serve to be “the right questions” to ask: (but not limited to these)

  • What inspired you to take that shot?
  • How did you capture that beautiful smile?
  • The lighting is beautiful. How did you get that highlight on their hair so perfectly?
  • That was very clever. What moved you to place the camera on the ground for that shot?
  • There is something that feels a bit mystical in that shot. How did you do that?
  • How did you capture that animal leaping at just the right moment?
  • You shot that photo at noon on a sunny day, but the lighting on that portrait is beautiful! How did you do that?
  • That’s a gorgeous shot you created in your studio. Where did you place the lights, and how did you combine the lighting so perfectly?
  • Did you have to wait long for that special moment to occur? You captured that so beautifully.
  • What was your thought process in composing that shot?
  • How did you get all those kids to be smiling all at the same time?
  • That photo of the bird is so perfectly focused on the bird, in spite of all the branches that were in front. How did you do that?
  • How did you entice him to do something so silly? It is a bizarre photo, yet I love it!

While the conversation might include a mentioning of what camera or lens was used, but it’s these other questions that matter much more.

Ask lots of questions. Try things. Make mistakes. Learn from your mistakes. Keep at it.

Just remember to ask the right questions or you might waste your time upgrading your camera when that might not have been the problem. 😉


P.S. You might consider taking some of my classes, especially my Finding Your Way class.

Share

Auto ISO – A Great Feature!

One camera feature that is sometimes overlooked by photographers is Auto ISO! This is a mode where the ISO setting is adjusted by your camera to a setting that the camera predicts as a useful choice without you having to manually adjust the ISO all the time.

This is an especially perfect option when shooting handheld. When your camera is in Aperture Priority Exposure Mode, the camera is “thinking” about what ISO would be right to ensure the shutter speed is fast enough for handheld photography, minimizing the effect of motion blur caused by hand movement. It also takes into account the focal length you are using, and it does a great job at making a good choice for the ISO value to be used. It raises it automatically in lower light scenarios, but then brings it back down to lower values in brighter circumstances. That is exactly what you would want it to do!

One small distinction is with regard to Nikon cameras: Nikons have something called ISO Auto Sensitivity Mode. Rather than totally surrendering control of the ISO to the camera, as other brands do, Nikons allow you to still set the ISO value, and then when you enable ISO Auto Sensitivity Mode (in your menus), it will automatically will override your ISO choice if it thinks your choice is too low for handheld photography when in Aperture Priority Mode. That’s still a great feature! You could just set your camera to ISO 100 or 200 and just let the camera raise it automatically as needed.

Also, Auto ISO is quite useful in Manual Exposure Mode! In this mode, you then take control of both the aperture AND shutter speed, and the camera will try to choose the right ISO value that will work for that aperture/shutter combination (at least within the limits of your camera’s capabilities).

SO if you have never used Auto ISO before, I encourage you to check your user manual and try it out!

Share

Whatever You Are, Be A Good One

Dear photographer friends,

I encourage you, as a photographer, to purse the greatness within you. Your art can (and should) be distinctively your art! Sometimes we artists might find our creative selves sort of drifting between copying other’s styles or losing inspiration entirely.

I am a firm believer in embracing your individuality and don’t really worry about imitating others or even seeking the approval of others. Find the part of this art that motivates you to create more art, to improve in your skills and vision, which will lead to even better art!

Photography has been my life for a lot of years, and know first-hand how we artists can sometimes lose our inspiration. Or even if we do feel “inspired,” we still might feel like there must be something more we can do to expand our creativity.

Having taught countless photographers over many years, I have found many photographers think the key to better photography is just knowing their camera features better, and managing exposure modes, aperture, shutter speed, ISO, and all that. Yes of course those aspects are important. They are our “tools of the trade,” but they are just the starting point. The REAL journey in the art of photography begins when you get in touch with yourself and your creative vision.

I consider this SO important, I created a class for that called Photography: Finding Your Way – Creativity and Inspiration Workshop. The funny thing I’ve observed is that a lot of photographers think they don’t need that class but I sincerely believe every photographer would benefit from this workshop, so I can’t emphasize it enough.

Here’s one example comment from a class participant:

“It’s so easy as an amateur photographer to become overwhelmed with all the technical aspects of photography. And as a photographer at any level, there is often an expectation of working to get the best technical picture. Kevin does a wonderful job of teaching the technical aspects of photography, for sure, but his Finding Your Way class focuses instead on the joy of photography, on photography as an experience and way to express ourselves. We are all creative beings, an image of the great Creator, and it is healing to the soul to pursue that. In addition to revealing the depth of Kevin as an amazing person, this class gives permission and encouragement to explore our individual path of creativity using photography. We laughed, we cried, we learned, and we found the spark that drew us to photography in the first place. Thanks, Kevin.”

At times, I am tempted to say this class is required of any photographer who wants to take any of my other classes, but such a requirement just isn’t practical. So, I am left with just “urging” you to sign up, and see what you discover about you and your photography. (You can thank me later! 🙂 )

Whatever type of photographer you turn out to be, be a good one!

Here’s The Link to Learn More and Sign Up


Some Insights to Consider:

“Creativity involves breaking out of established patterns in order to look at things in a different way.”

Edward de Bono

There is no such thing as creative and non-creative people, only people who use their creativity and people who don’t.

Brene Brown
Share

The Path to Learning Photography

There are many ways to learn photography. While there is no one “right way,” there are choices you can make in where you devote your energy while trying to learn. For example, if you have a DSLR or mirrorless interchangeable lens camera, you’ll find it has so many options and features. Which modes should you use? Which should you avoid? What features matter most? These questions lead to important answers. When you are just starting out, you don’t really even know the questions to ask. All you know is you want to take better photographs!

As with anything in life, some lessons have to be learned the hard way. You’ll make mistakes, but those are learning opportunities. If you find a solution for a problem you’ve encountered, you have grown in the process. Still, I want to encourage you to consider some suggestions on paths you might choose in your process of learning photography.

Learn the Fundamentals

Get to know the basics of how a camera operates. Learn about the Aperture, Shutter Speed, ISO, Exposure Modes, White Balance, etc. While you could just use your camera’s fully automatic mode, you’ll miss out on some great capabilities you might not even realize your camera can do. Starting with a firm foundation in the fundamentals of photography is always a good possibility for beginning your learning. I have a class called Photography 101 Fundamentals of Great Photography that would be a good starting point. Also check out my book on Amazon, “30 Practical Tips for Better Photographs.

Expand Your Creativity and Inspiration

Just as important as the technical details are the artistic considerations. More than camera settings, this is about how you see the world, what excites you, what motivates you, and what inspires you. It is so important to explore this side of the art of photography as well. In fact this is also a good starting point. Or after you learn the basics, I’d recommend devoting some time to this other artistic side of photography. I highly recommend taking this course I teach “Photography: Finding Your Way – Creativity and Inspiration Workshop.

Gradually Advance Your Skills Further

Once you have been exposed to the basics of camera settings, etc. It is wise to remain always in that mode of seeking to learn more, and practice, practice, practice. I encourage you to keep striving to be more comfortable with adjusting camera settings for a variety of different scenarios, indoors, outdoors, actions shots, night sky shots, portraits, wildlife, nature, etc. I have a Photography 201 – Expand Your Photography Skills class you might consider. Also, sharpen your nature photography skills with this class: Nature Essentials Photography Class.

Be a Student of LIGHT

Pay attention to light, both in the good qualities of light and the not-so-good qualities of light. Learn to manage and manipulate light. Quite often a photograph can be improved dramatically by simply using better light. I occasionally offer a course on light and photography. As we move further past this pandemic, I am sure I will offer this class again! Either way, this is something you can study on your own, too. Pay attention to the qualities of light that you find attractive, and take more photographs with that type of light. The more you do this, the better your photographs will be! Also, if you are trying to figure out how to use electronic flashes (often called SpeedLights) I have a class for that: Flash / Speedlight Photography Workshop.

Learn the Software

A very important part of digital photography is the process you choose for managing and enhancing your photographs on the computer. I love Adobe Lightroom Classic. It’s a very powerful and full-featured program. I offer a class that will get you off to a great start: Adobe Lightroom Classic CC Workshop. And then, when you are ready to really explore the full amazing photo editing capabilities of Photoshop, I offer this class: Adobe Photoshop CC for Photographers Workshop.

Share

Buying a Better Camera Does Not Make You a Better Photographer

The real key to better photography is more about YOU than it is about your CAMERA. Sure, camera features matter, but what matters more is how you use your camera and how well you understand the fundamentals of photography.

There’s the old joke about a person who invites friends over for dinner. The food was wonderful and the guests all enjoyed the meal. At the end of the evening, they said to the cook: “That was a wonderful meal! What kind of pots and pans did you use?”

As photographers, our “pots and pans” are our cameras and lenses, etc. I am not saying our camera gear is unimportant. I am just saying what matters more is how you use them.

Or as Ansel Adams said: “The single most important component of a camera is the twelve inches behind it.”

The key to better photographs is about YOU:

  • Know the fundamentals of photography and all the technical aspects of aperture, shutter speed, ISO, focal lengths, white balance, etc.
  • Understand your camera features and use the right settings at the right times
  • Become an avid student of LIGHT, all aspects of light, qualities of light, ways to manipulate light, mixing light, creating beautiful light
  • Always strive to be better, always learning, always growing

I am a full time pro photographer with a full service studio in NW Austin, and have years of experience helping countless numbers of photographers learn the fundamentals and then progress further, growing in their knowledge and skills. I have many former students who have gone on to be professional photographers.

I would love to help YOU in your journey to become a better photographer.

Check out my upcoming group classes and also remember I offer private instruction as well.

I look forward to hearing from you!

Kevin Gourley

Share

Correcting a common misconception

Hey friends! I thought I should post a comment about this common misconception about the use of a flash diffuser in wildlife photography.

A few years ago, I took a quick snapshot with my iPhone of a photographer’s setup photographing elk over 50 yards away. In fact, he wasn’t just a photographer, he was a photography instructor leading a group of other photographers on a “wildlife photography workshop.” I have since seen numerous “photography experts” advising the use of this exact setup, with the claim that a flash diffuser like the one used above will “soften the light and blend it more naturally in wildlife scenes.”

I don’t want to embarrass anyone who may do this, but actually this advice is totally incorrect. Adding a flash diffuser on a speedlight/flash while shooting wildlife with a telephoto lens like this is totally pointless, so don’t bother following that advice from “experts” who claim it is so important to do so.

Let’s say you just put a flash on top of your camera, without a diffuser. Depending on whether your flash has a zoom capability, its light distribution will vary a bit, but the light will be projected outward like below.

The only portion of the light that illuminates the elk are the light rays in the red region. The light that goes above the elk, into the sky, has no effect on the photograph.

IF you use a flash when doing wildlife photography, really the only thing you need to make sure you do is to not have the flash be a dominant source of light. It should only be adding a small amount of light on the animal, otherwise the photograph will not look natural.

In this case, with the elk being 50 yards away, it is not likely the flash will even have that much effect on the photograph, given the inverse square law of light will result in only a small amount of light illuminating the animal. That’s ok since you don’t want much light contribution from the flash anyway.

Now, let’s say we add a diffuser on the front of the flash because so many “experts” say that will soften the light on the animal. Note below how the light rays are just scattered more broadly by the diffuser. Doing so, does not “soften” the light whatsoever. It only scatters the light.

Again, the only portion of the light that illuminates the elk are the light rays in the red region. The light that goes above the elk, into the sky, has no effect on the photograph. And the light rays are just as much coming from a pinpoint source of light, and the light on the animal will not be diffused any more than if you used a flash without a diffuser. The light actually illuminating the animal will look exactly the same either way.

What’s worse, adding a diffuser will cut down on the light output of the flash by maybe 2 stops or so, right when the flash is already limited in being able to have much effect on a subject 50 yards away.

What that means is the diffuser, at most, is really just causing you to burn through batteries much more quickly because the flash will most likely have to push out a full-power pulse of light to have any effect at all, AND the light isn’t diffused anyway. And harder you make the flash work, the slower the recycle times.

Some people have questioned me on this, saying they have noticed that when they use a diffuser, it does seem to “soften” the light and make it not look as much like a flash was used. Actually, when that happens, what is really occurring is the diffuser is inhibiting the light output, so the ambient light is more dominant and the flash is less dominant. It is not really softening the light from the flash. It is just diminishing its light output by a couple of stops. You could also reduce the light output by reducing the power level of the light, or if you are shooting with TTL, use the flash exposure compensation to reduce the light output, and save your batteries. No need for a diffuser, ever, for a scenario like this.

Of course, this is a bit ironic, considering that little white device you can attach to your flash is often called a “diffuser” and ads for those devices often boast how they soften and diffuse the light, but that really is for indoor use where it scatters the light more broadly so it will bounce off more surfaces like walls and ceilings. For outdoor use, you won’t be bouncing the light off the sky. Keep your diffuser for indoor use. 🙂

Happy picture taking!

Kevin

Share

I Get By With a Little Help from My Friends

I guess most of you have heard of the song “With a Little Help from My Friends.” Well this blog post really has nothing to do with that song. :-}

In this blog post, I am really am just briefly talking about how much a little help from electronic flashes / speedlights can enhance a portrait. They are my best friends for portraiture on location whether indoors or outdoors. The key is to use them to enhance and blend with the ambient light in the scene to make the image better.

I have seen so many people say they hate using speedlights because they just don’t like the results they get, the light is too harsh. Actually the trick is to use them in the right way. Of course, you sure don’t want to add bad light to a scene. Use speedlights to add good light, to a scene. By “good” I mean light that has attractive qualities, mixing in soft diffused light, or adding subtle highlights intermingling with the ambient light. You can do this with various light modifiers such as reflectors, photographic umbrellas, or softboxes.

So, this post is intended to just encourage you to not give up on speedlights. Just use them in the right way at the right time. They are your portable magic light sources if used in the right way. They are your friends.

Want to know about my next online class on using flashes/speedlights? Click here

Want to listen to the song by the Beatles? Click Here

🙂 Kevin

Here are a few photographs that were created with a little help from my friends.

Share