Category Archives: Photography Tips

A Matter of Perspective

Depending on the lenses you own, you can achieve different effects in image perspective through the focal length you choose.  The lens focal length is measured in millimeters (mm) and on a zoom lens the focal length is adjustable.  The lower the focal length, the more “wide angle” the field of view.  Higher focal lengths are said to be in the “telephoto” range.

One aspect about your choice of focal length that is worthy of mentioning is how your choice affects perspective and compression of depth as you go to the longer focal lengths.

A wide angle lens tends to make the foreground elements look more enlarged and the background appears more distant and smaller. Telephoto lens do just the opposite.  They tend to make elements in the background appear large. The longer the focal length, the more exaggerated the effect is.

Take, for example, this image shot with a very long focal length telephoto lens (400mm). Note how the mountains look enormous! The mountains are big, but the choice of a powerful telephoto lens really emphasizes the majesty of the mountains.

Or in this shot below, taken with a moderately wide angle lens (24mm), the foreground is featured more and the mountains appear more distant and smaller.

Focal length is an important consideration with portraits also.   A portrait shot with a wide angle lens will look different from a shot taken with a telephoto lens.  Generally speaking most portraits are best done in the 50mm to 150mm range (take into your camera sensor’s crop factor).

I love having a variety of focal lengths available to me so I can achieve the effect I desire, so I virtually always along both wide angle and telephoto lenses in my photography.

Happy Picture Taking!

Kevin Gourley

Share

And the Winner Is…

It’s that time of year where the Academy of Motion Picture Arts and Sciences recognizes excellence in cinematic achievements in the film industry, and so many people tune in to see who will win awards for their creative talent.

I love seeing people excel at their art, whatever their art might be. The Academy Awards is not just about excellence in art. There is a lot of behind-the-scenes politics that goes on, and jockeying to make sure “their” film gets noticed.  It’s only normal that would be the case because there are big bucks involved. Still, I’ll try to not be too cynical about it all, and just celebrate success in art.

I think about so many artists I know who are not “winners” in the sense of  having gotten an award, but I look at the art they are creating and I very much see them as outstanding artists. I see them as “winners”, even without an award. And I see some artists who are getting better, gradually perfecting their craft, and maybe still have a way to go (hey we all do, honestly) but when I look at how far they’ve come, I cant help but see them as “winners” also.

Photography is a form of ART that is really pretty technical. For some folks, the technical stuff can be a little overwhelming. For others, they just love the technical stuff, and in some cases get obsessed by it. (Ok, self confession, I have a Master of Science degree in Electrical Engineering, thus I have a degree in being  a “nerd”) For us nerds, we have to be careful to not let our nerd-ness get out of hand.

Especially when you are bombarded with all the marketing out there, you can be lured into thinking that you simply must own all the highest quality technical gear available today: the absolute sharpest and fastest lenses, the “highest quality glass” (lingo for fancy lenses), cameras that go to ISO 3,280,000 or can shoot 11 frames per second or have a huge sensor, the most expensive lights available, etc.  Now I am NOT saying that having good quality gear is bad at all. But what I am getting to is that as much as we might be tempted to think that our photographs will turn out so much better if we had the best gear available to us, that just doesn’t turn out to be the case.

This is ART.  Creativity, talent, skill, and knowledge of how to make the best use of what you own matters way more than having the most fancy equipment available.  Ultimately, “technical perfection” is not the “winner”. Strive to create great art, regardless of what camera  you own.

Or here’s a musical analogy: You may have seen this youtube video of a street drummer doing some pretty cool drumming with plastic buckets. No fancy drums. Just plastic buckets.


I encourage you to push yourself to excel at your art. Don’t worry about how fancy your gear is.  Just focus on using it better. Sharpen your skills. Ask questions. Learn. Make mistakes. Learn some more. Get better.

And don’t worry if your work is not as good as others’ yet.  Just keep striving to be better.  If you keep doing that, in my view, YOU ARE A WINNER.

Happy Picture Taking,
Kevin Gourley


Share

Protect Your Lens

The first thing I do when I buy a new lens is put a “UV Haze filter” on the front, mainly to protect the lens.  If you ever have something hit the front of your lens and scratch it, it is cheaper to replace the filter than to replace the lens.

Every lens I own has a filter on it to protect it. There are times where you might need to take it off, if the extra layer of glass causes any problems with light flare or reflections.  That is most likely to happen if you are pointing the camera toward light sources such as street lights at night or looking toward the sun.

You will find some people who believe putting any additional layer of glass on the front of a lens degrades the image quality, but frankly that impact is so very small, it is really negligible compared to the value of having the protection provided by the filter. The only time it is really a concern is if there is a problem with flare.

Most lenses show their filter size in millimeters (mm) somewhere on the lens, usually on the front.  The filter size is not the same as the focal length.  So, look for the right filter size before you make a purchase!

Filter Size

Be safe or sorry!

Happy Picture Taking!

Kevin Gourley


Share

Managing ISO

You may already know about the ISO setting on your camera.  This setting controls the camera’s sensitivity to light.  The higher the number, the more sensitive it is to light.  For hand-held photography, generally you can shoot at lower ISO settings in bright scenes, and you will have to move to higher ISO values in lower light.

There is a tradeoff when you move to higher ISO values.  The image becomes more “grainy” due to a phenomena called “digital noise” that degrades the photo.   Cameras are getting better all the time with abilities to go to very high ISO values.  Generally you want to avoid the highest ISO settings on any camera, and stay as low as possible.  Built-in high ISO noise reduction and features to reduce noise in programs like Adobe Lightroom can help, but you are still better off not having the ISO go higher than it needs to be.

How high does it “need” to be?  The answer lies with the shutter speed.  If you are shooting hand-held, the shutter speed needs to be fast enough to minimize motion blur caused by hand movement.  A very general rule of thumb is to keep the shutter speed at 1/(focal length), so it depends on the focal length of your lens.  The longer the focal length, the faster the minimum shutter speed should be.   Other factors like sensor crop factor and whether you have Image Stabilization/Vibration Reduction also affect that, but the general rule is a good starting point.

The other reason you might need a higher ISO to achieve a faster shutter speed is if you are trying to freeze motion of the subject in the photo, as in sports or active wildlife.

As you move to higher ISO values, you can shoot at faster shutter speeds.  If you need the shutter speed to be twice as fast, simply double the ISO.

Assuming you  are just trying to minimize the effect of hand motion blur, there are two ways you can deal with the problem.  Move to a sufficiently fast shutter speed using the rule above, increasing the ISO as needed, OR put the camera on a tripod.  If the camera is on a tripod, you don’t need to move to a high ISO to minimize hand vibration. That shutter speed rule ONLY applies when shooting hand-held.

Auto ISO

Many cameras offer a feature that can help you get sharper hand-held shots.  Canon and Nikon deal with it a little differently so I’ll explain both approaches.

Canon  has a special ISO setting called “Auto”.  When you use Auto ISO while shooting in Av (Aperture Priority) Mode, the camera takes control of the ISO to try to ensure the shutter speed is fast enough to minimize blur caused by hand vibration.   So, if you increase the lens focal length, you’ll see the camera automatically increase the ISO.  Or in Tv (Shutter Priority) Mode, the camera ensures the ISO is high enough to enable you to use the shutter speed you have chosen.  Or in Manual Mode, you can set the shutter speed and aperture to whatever you want and the camera will try to pick an ISO that enables you to use those specific settings.  Auto ISO is pretty handy.  On my Canon EOS 6D, it does a pretty good job with Auto ISO. But note that this is primarily used when doing hand-held photography.  When shooting on a tripod, you don’t need to follow that hand-held shutter speed rule and you don’t necessarily need to raise the ISO to higher values because the camera is already stable because of the tripod.  (Note: turn off the Image Stabilizer when shooting from a tripod.)

ISO Sensitivity Auto Control

Nikon doesn’t have “Auto ISO” but has something similar.  Nikons have ISO Sensitivity Auto Control.  You have to configure its settings through the menu.  The basic idea is that the camera lets you pick the ISO and if the camera detects that you have made a poor ISO choice for hand-held photography, it automatically intervenes and changes the ISO to a more appropriate value.  There are various parameters you can control from the menu, so you’ll want to check it out.  Again, this isn’t necessarily appropriate if you are shooting from a tripod.

I encourage you to explore these options and become familiar with how they work.  As with all tools, they have a time and place where they come in handy.

Happy Picture Taking!

Kevin Gourley

Share

The Artist’s Crisis

I have so many photographer friends.  Many are hobbyists, and others are professionals, either part-time or full-time.  Photography used to be my hobby, back when I did it simply because I loved photography.  I think that’s why most photographers DO photography, simply a matter of love.

I think most artists are fragile.  Okay, sure some artists are arrogant jerks (I only say that because I have known a few.) But for the most  part, artists are sweet beautiful people who see their “art” as an extension of themselves.  They/we want other people to love our art because we feel better about ourselves.  I might be wrong on that in some cases, but for the most part, all you have to do to make an artist smile is to tell them you love their art.  They/we bask in the adoration.  “Ahhh I am loved.” 🙂
And if you are a Facebook user, tell me… when you post a photograph you’re really proud of, do you keep checking to see how many “likes” you’ve earned?

More “Likes” = “I must be a better photographer”

Would an artist keep doing their art if they only got criticism?  “Your art sucks.” doesn’t usually serve as a good motivator.   In fact, if several people tell you your art is terrible, you probably will be tempted to throw your camera off a cliff, or maybe jump along with it. (But don’t do that.)

I am a big believer that every artist should, to some extent, resist this yearning to be affirmed, and instead pursue their art for themselves.  Do it because YOU love it.  Excel because YOU love what you are doing.  Challenge yourself because YOU want to create even better art.   Maybe don’t even do your art the way others do it.  Be creative. Be different. Be you. You are the WORLD EXPERT on being you! So be good at it!

I think when we tune into that creative force within us, there is something really cool happening.  Now I don’t want to get all “spiritual” on you (and some of you might not agree with me on this anyway) but I think our creative nature is something given to us by God. I see God as a loving force that is in the business of “creating” and we are created in God’s image, so we also are creative beings.  At least that’s the way I see it.  Regardless of how you see it, I think you’d agree that there is something special and unique about us humans… we seem to be built to create art and music.  I love it when I see someone create beautiful art, expressing that creative force within themselves.

The Curse of “Going Pro”

I am a full time pro photographer.   I have to admit, I wonder sometimes why I did this.  I have been in business for myself for almost 20 years, so I am somewhat comfortable with the unpredictable income varying from month to month.  I LOVE working for myself.  Well, for the most part.  Ok, parts of it I hate.

Being  a pro photographer is not as “glamorous” as some people think it is.  I mean I am not always out doing some amazing photography in the mountains of Colorado or photographing a beautiful model.  I am also the janitor.  Yes that is my hand carrying out the garbage from my studio.  That is a better summary of daily life, just doing what needs to be done because it is my job, not just my hobby.  And then there is the book keeping.  Thank God my wife handles that.  I am grateful for that. I hope she never screws up because I can’t fire her.

I think the hardest thing about doing photography professionally, though, is the fact that as soon as you accept money for your service of photography there is an expectation that you will do a good job.  You are no longer in the business of pleasing yourself.  You have to please someone else.

Pleasing someone else is kind of tricky.  It is subjective. You might create a photograph that you think is absolutely fantastic.  The lighting is just absolutely perfect. Then the client says, they don’t like their smile in that shot.  But don’t they see how beautiful the light is??  Check out that bokeh. Isn’t that perfect??  Nope, the smile is all wrong.  Well darn.

The challenge is very real.  You are placing yourself in the position of creating something that you need someone else to love.   In this mission, you are BOUND TO EVENTUALLY FAIL at some point.  And then the temptation is to run over to that cliff with your camera and jump OR you decide you want to be a plumber.  That’s it.  You’ll become a plumber. They are paid pretty well.  And no one can argue with you when you show them you fixed their stopped drain. It’s working now.  That’s not a subjective thing.  It is either fixed or it isn’t.  Yep, I am going to be a plumber.

Or maybe you just had a bad day and you just blew it.  No excuses.  You just didn’t do a good job and you know it.  Again that is BOUND TO HAPPEN SOMETIME.   You want to minimize this stuff from happening, but it happens.  Most photographers won’t necessarily admit this can happen but it does.  Now you are scrambling to see if you can somehow fix the shots in Lightroom or some Herculean effort in Photoshop.

I guess  am just writing this to say, if you hit an “artist’s crisis” like this, don’t give up.  You are not a failure.  Just try to recover and keep moving forward.   You are not the only person this has happened to.

I personally know of photographers who I think are OUTSTANDING photographers who have faced this crisis.

If you need a hug.  Drop by and I’ll give you a hug.

Whatever you do, don’t give up.

I love you artist types.  Keep making art.

Kevin Gourley


Share

Sometimes Confusing – High Speed Sync on Speedlites

Someone recently asked about using a Speedlite’s High Speed Sync mode to shoot at faster shutter speeds to get sharper images by reducing vibration blur in hand held shots.  If you have ever wondered about this, let’s explore this a bit to discover why this might not have the intended consequences.

Have you ever run into problems where you want to shoot at faster shutter speeds with a flash, like a Canon Speedlite or a Nikon Speedlight but find the higher shutter speeds are not accessible?  You’ll hit a barrier where some shutter speeds are not permitted because the higher shutter speed are so fast that the curtains of the shutter do not even have time to allow the shutter to be fully open.  Thus if the shutter curtains were not fully out of the way, the flash would not evenly illuminate the image.  The fastest shutter speed that can be used where the shutter is fully open is called the ‘flash sync speed’.  Shoot at any shutter speed above that, and the shutter curtains get in the way.

Example 1:  For at least a brief time, the shutter is fully open. In this case, the flash can fire and properly illuminate the subject:

Example 2: At faster shutter speeds, beyond the flash sync speed, the shutter curtains are not fully open, and the flash would not be usable:

SO what that means to you is that you can encounter various problems.

What if you are shooting outdoors on a bright day?  In that case, your photographs shot with a flash are likely comprised of a portion of the light contributed by the ambient (existing) light in the scene and then the flash is adding to the light of the scene.  It is entirely possible that you may need to shoot at shutter speeds that are faster than the camera’s flash sync speed in order to minimize motion blur due to hand held camera vibrations OR to reduce the amount of ambient light exposed on the scene.  In either case, you sometimes really need to shoot at faster shutter speeds.

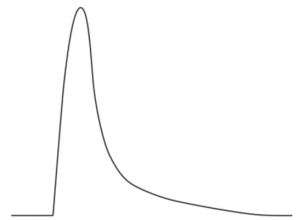
That’s where Canon’s High Speed Sync mode or Nikon’s Auto FP modes come in. They change how the flash works.  Normally the pulse of light from a flash is VERY brief, depending on the power level of the flash.  The lower the power, the faster the pulse. They can be speeds like 1/5,000th,  1/10,000th or even faster in some cases.

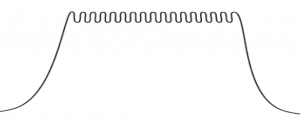
When you turn on the Canon High Speed Sync (HSS) or Nikon Auto FP mode, the flash actually extends the pulse of light and keeps pulsing it so that the light will be on the entire time the shutter is open.

For example, on a Canon 6D which has a flash sync speed of 1/180th second, if you turn on HSS mode on a Speedlite, and set the 6D’s shutter speed to 1/200th second, it actually SLOWS DOWN the light pulse from the Speedlite to extend it’s duration to 1/200th second.  So, ironically, “High Speed Sync” mode really slows down the flash even though you might think the name implies just the opposite.  It still has great value though.  If you are shooting outdoors and need to shoot at 1/500th or 1/1000th, HSS lets you do that.

Now, let’s say you are shooting indoors, like when you are using flashes in a home studio environment, where your flashes are the only appreciable source of light.  If your exposures are not really trying to mix in any ambient light, then you don’t need to shoot at any particularly fast shutter speed and HSS is not really necessary.  All you care about is having the shutter open fully while the flash(es) provide ALL of the light for the exposure. In that case, HSS actually is not helpful, and you actually CAN pick up motion blur in a flash photo if you are not careful.

I ran a simple test photographing a pinwheel spinning at a constant speed.  This really illustrates the difference where HSS actually can contribute to motion blur in some cases!

Ambient light, slow shutter speed,  0.4 seconds: 

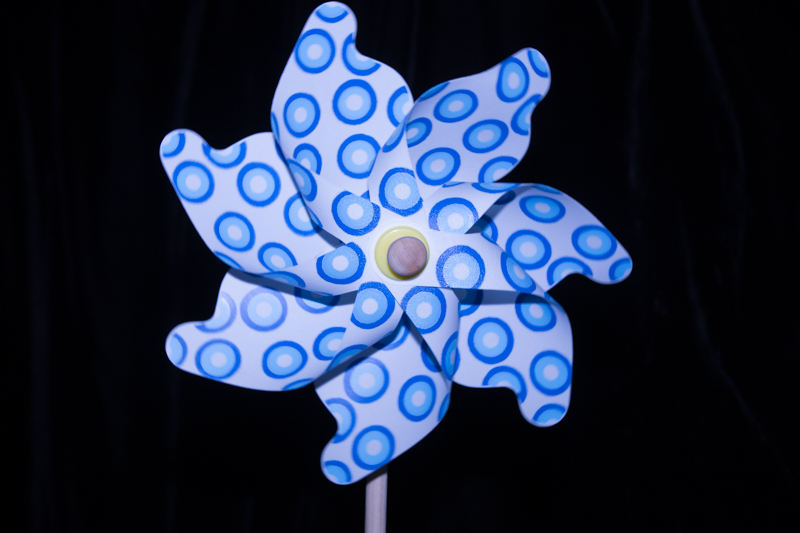
Speedlite is the primary light, no ambient light: 1/60th second:

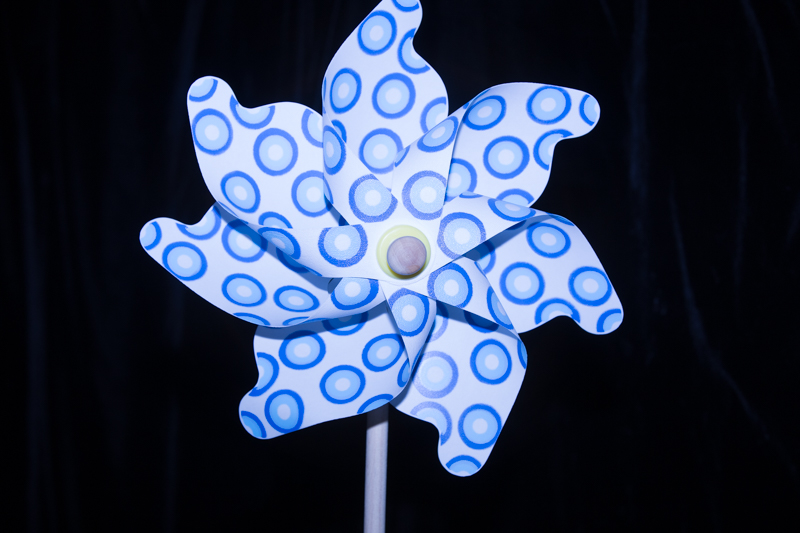
Speedlite is the primary light, no ambient light: 1/180th second:

Note that for the two shots above, the image is very sharp, regardless of whether I was shooting at 1/60th or 1/180th. The only light really illuminating the pinwheel was from the flash and that pulse of light was ultra fast, maybe 1/5000th or more.

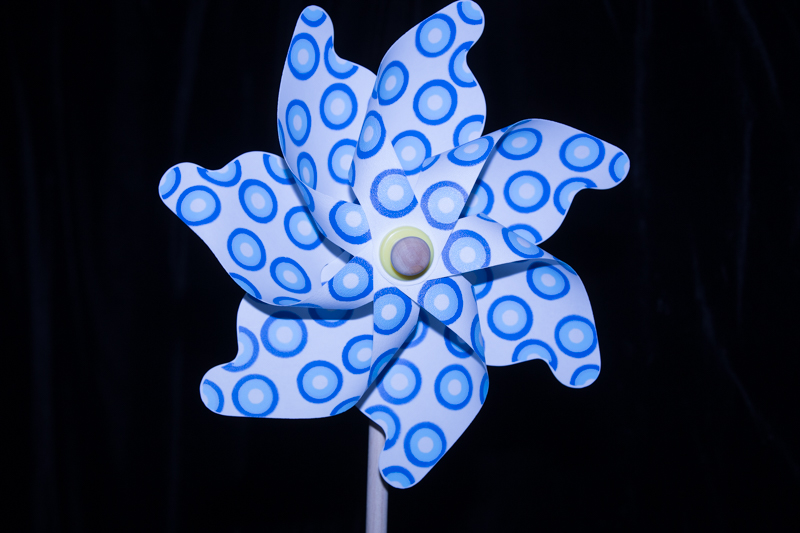
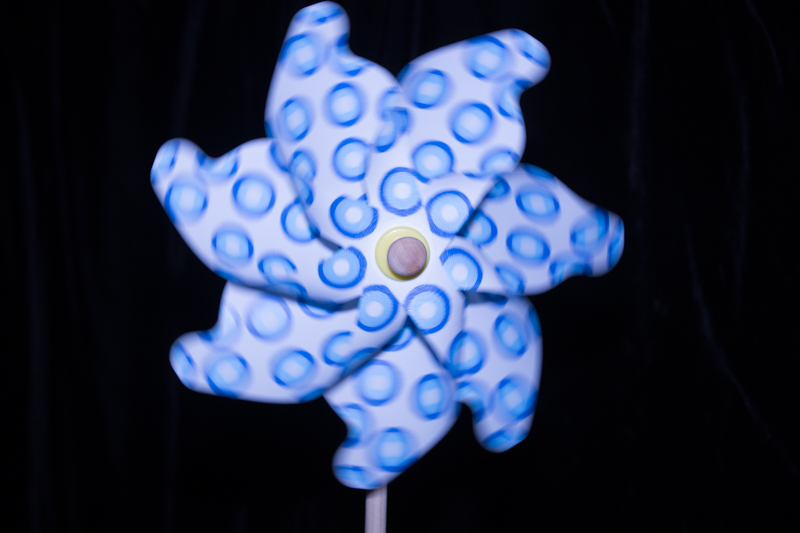
Now see what happens when I turn on HSS and shift the shutter speed even FASTER to 1/200th:

WHAT?  I went to a FASTER shutter speed and now I am picking up MORE motion blur??? YES!  That’s because with HSS, the flash is now SLOWING down the duration of the pulse of light to be on during the entire time the shutter is open.  The result is you are ironically capturing more motion blur by moving to a faster shutter speed.

Ok, let’s try 1/400th second:

Even at 1/400th, we still are not freezing the pinwheel! Ouch!

Let’s try 1/1000th:

Even at 1/1000th, it’s still not totally freezing the motion of the pinwheel! There still a tiny bit of blur.

Kind of amazing.  With the shutter speed set to 1/60th, the pinwheel was tack sharp and had no motion blur, but with the shutter speed set to 1/1000th, you still see motion blur!

I found I had to go up to about 1/2000th to stop motion blur when using High Speed Sync in this test case:

If you don’t use a flash, and haven’t dug into the details about how to operate your flash, you may never have encountered these issues.  I just thought I’d share these insights in case you are actively using a flash and are a Canon owner using High Speed Sync or Nikon Owner using Auto FP sync mode.

I hadn’t really thought about just how drastic HSS could impact motion blur until someone asked some questions about freezing motion by USING HSS and the more I thought about it, I realized that HSS really can introduce a problem in some situations, like in this test example.

For outdoor use, where you are mixing ambient light and flash though, I find HSS pretty useful!

Happy Flash Picture Taking!  🙂

Kevin Gourley


Share

Alien Skin Software: Exposure X2

First, I have to make a clear confession.  I am a proficient Adobe Lightroom user, and don’t have much experience with Exposure X2 from Alien Skin Software.  BUT I just took Exposure X2 out for a “test drive” and thought it was worthy of pointing out this nifty program to you all.   Yes, Exposure X2 can be used as a plugin from Lightroom, but it also can be used as a standalone program.

If you have experience with Adobe Lightroom, the first thing that you’ll notice is the incredible similarity of much of the user interface. With some portions of the program, you’ll almost feel like you are using Lightroom!  In spite of it feeling sort of like Lightroom, it’s definitely not Lightroom. Exposure X2 has an impressive set of photo adjustment tools built in.

You’ll quickly notice that there are not different “modules” for managing and organizing that are separate from the developing and editing of the images.  Unlike in Lightroom, it is all kept together in one interface.  That has some advantages.  Also, as soon as you start using Exposure X2, you might notice that you immediately have access to ALL of the images on your computer.  There is no need to first “import” them. They are just there ready to be edited when you open a folder.

When you do any editing, remember that Exposure X2 still does “non-destructive editing”, meaning that it doesn’t really change the image until you export it.  (Believe me, thats a good thing.) And it works handily with RAW and other image formats. As you look over the editing capabilities, you will see a range of additional tools not found in Lightroom, such as overlays of really cool borders, light effects such as flames and flare, infrared simulation, simulated bokeh adjustments, and a variety of textures.

All of these additional built-in editing tools make Exposure X2 still useful as a plugin in Lightroom even if you don’t use it as a full Lightroom replacement.  But keep in mind it is indeed a fully capable standalone program.  Just note that if you were to make a complete transition from Lightroom to only use Exposure X2, Exposure X2 will not automatically know about the edits that reside within the Lightroom catalog.  So even though the interfaces look similar, it does not mean it’s an instant switch to quit using Lightroom and switch fully over to Exposure X2.

As I mentioned, Exposure X2 is capable of browsing any drive or folder to view and edit images without having to use any sort of ‘import’ operation.  Its response is pretty snappy when you browse to a folder it hasn’t viewed before. Exposure X2 appears to be a well designed program, not just in its user interface, but “under the hood” with fast efficient processing of images, which you really need when you work with thousands of images.

OH and one last point. You can also use Exposure X2 as a plugin from Photoshop!  That is really cool because if you are proficient in Photoshop, you can use layers to mask in Exposure X2 effects in portions of an image or mix and blend the effects, further enhancing the value of using Exposure X2 as a handy tool in your bag of tricks along with other plugins and tools.

Check out Alien Skin Software and see if their software or plugins might be a fit for your photography workflow!

http://www.AlienSkin.com


P.S.  My students get a generous 10% OFF Alien Skin Software!  Thank you Alien Skin!

Happy Photo Editing!

Kevin Gourley

Share

Change Your Perspective

Looking for new ideas in your photography?  One easy suggestion is to simply change your perspective! Change how you LOOK at the world!  Instead of shooting from eye-level, how about putting your camera on the ground? Or take a photograph looking straight up or down!

Look for small details along a trail.

While the overall scene might grab your attention…

… look for interesting detail shots.

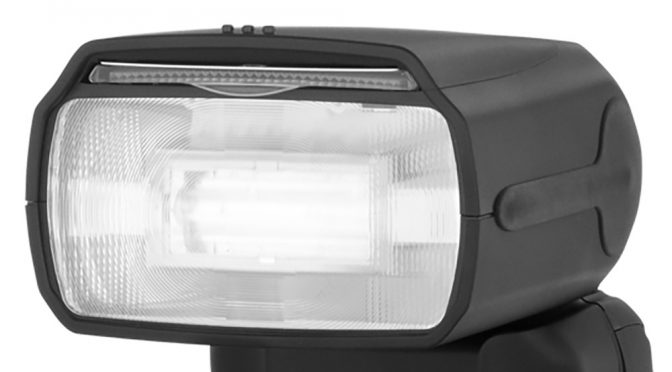
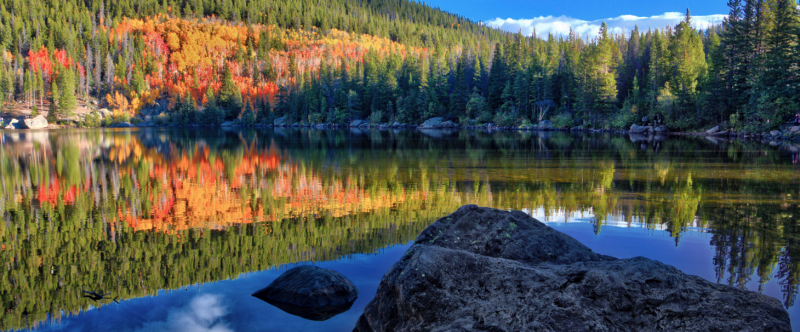
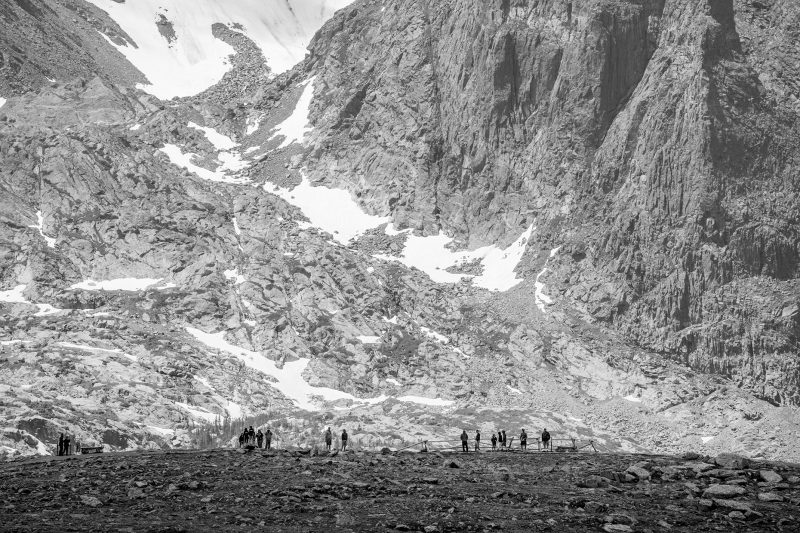
 When you are hiking on a trail, take the time to PAUSE and look around. Look up.  Look down. Look behind you.  Look in all directions. Sometimes, when you are hiking you miss things! Hiking for exercise is different than hiking for photography. S-L-0-W down and you’ll discover a beautiful world around you!

Happy Picture Taking!  🙂

Kevin Gourley

Share

Use a Speedlite and a Softbox for your Outdoor Portraits!

A lot of people ask me what type of lighting I use for shooting portraits outside. I often use a couple of Canon Speedlites 600EX RT.  Other brands like the Phottix (for Nikon or Canon) work well also.

For my off-camera speedlite, I have the light angled at about 45 degrees to the side and raised up a bit, and it is mounted on a softbox.

I use an Impact 24×24″ Softbox, but you could use any brand really, and get nice results.

Of course there are a lot more details I could cover, but I wanted to keep this simple in this article.

Every camera works differently in how it interacts with a flash/speedlite, and there are all sorts of considerations regarding shutter speed, high speed sync, front vs rear curtain sync, mixing ambient light etc.

Using TTL (known as iTTL or ETTL etc. depending on the brand) is the easiest way to operate your flash.  One helpful trick is to underexpose the ambient (existing) light by about 1 f/stop.

If none of this makes sense to you, I offer Light & Photography Workshops intermittently throughout the year.    Plus, when I have enough people interested, I am happy to add a ‘Learn by DoingWorkshop on this topic any time!  Just go to this web page and fill out the form if you are interested (look for the bright green box on that page).

For this article, I just wanted you to know what type of gear I typically use for my outdoor shots, since lots of people have been asking.

Happy Picture Taking!

Kevin Gourley

Share

Chromatic Aberration – Why It Matters!

Adobe Lightroom has a nifty little checkbox called ‘Remove Chromatic Aberration’ in its Develop Module  in the ‘Lens Correction’ section.

Have you ever noticed it?  Well, if you haven’t, I encourage you to check it out!  It fixes a problem common to many lenses called ‘Chromatic Aberration’.

Here’s the dictionary definition:

Did you get that?  If that didn’t make sense, here’s another way of describing the problem.  You may notice that with some lenses, you’ll see some magenta or green fringing of colors on edges.  It may be more noticeable on some lenses vs others.  And it usually will be more visible when you open up the aperture to lower f/stops.

Take for example, this photo I shot in Rocky Mountain National Park on a trail, using my Sigma 15mm Fisheye lens. When you view the whole photo, you may not notice the chromatic aberration, but it is there.

But if you look carefully, in the upper left corner, among the Aspen trees, you will see magenta and green fringing along the edges and the middle. It’s pretty noticeable, really bad in this case.  THAT is the effect of chromatic aberration!

So imagine you took this image and decided to make a nice large 20×30″ print to hang on your wall.  Once you get the large  print, you’ll REALLY notice the problem.

That is what that ‘Remove Chromatic Aberration’ checkbox is for in Adobe Lightroom, to attempt to eliminate the annoying magenta or green along edges. It usually does a pretty good job.

Simply checking that box, really cleaned up the problem pretty well.

So, remember, especially if you plan on making any large prints of your photographs, you should first check to see if you have any chromatic aberration problems and check that little box!

Happy Picture Taking!

Kevin Gourley

Share