Category Archives: Photography Tips

Photographers: Learn to Use the Tools

I have been into photography for over 40 years.  Starting out back in the days of film as a starving college student, I experimented with all kinds of photographic techniques, and took meticulous notes, learned what worked and what didn’t. 

One thing I discovered was that sometimes my mistakes led to important realizations. They were learning opportunities, where the conclusion was either “wow, I won’t do THAT again” or “I think I just discovered something really cool.”

That perspective has stuck with me over the years, to always be willing to try new things and learn from the process.  Most importantly, learn the photographic tools available and then use those tools to expand you artistic expression.

Most importantly:

  • Learn the fundamentals of photography really well. That will make all of this more “intuitive” to you if you understand what is really happening inside your camera.
  • Learn the specific features of your camera, special modes, unique focusing options, etc.
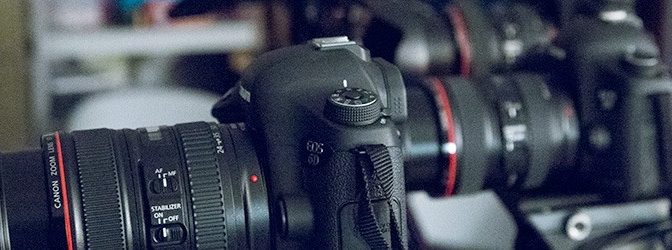
  • Buy the right gear that will best serve your needs.
  • Be a student of light. Be obsessed with this!!  Seek to know how to best use light to enhance your images.  Light is the essential ingredient in any photograph.  Mastery of light will yield better or more creative images, whether it is portraiture or macro photography or landscapes, light must be considered to achieve great results.
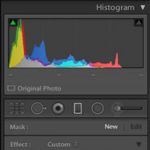
  • Know the software tools available to organize and edit your photographs. Become proficient with tools like Adobe Lightroom, Photoshop, and other tools, and the various great plugins to enhance images such as tools offered by Topaz Labs or Alien Skin Software or Skylum.

Check out my currently offered classes

This combined knowledge on all of these topics opens the door to do anything you can imagine.  This is what I LOVE about photography. I especially love taking on projects that allow me to be more creative. But even the standard images that pro photographers create are just going to be better if you master the equipment, light and the image editing software.

I create a lot of headshots in my studio. Business professional headshots are usually the most conservative when it comes to creative expression, but even with headshots, it is important to get the right mix of light and shadow for best results.

I also love shooting portraits.  These examples are not doing anything “wild” regarding creativity.  This still requires good posing and lighting techniques.

I love opportunities to use artistic expression and more dramatic lighting options. This is where your skills of lighting become even more demanding.

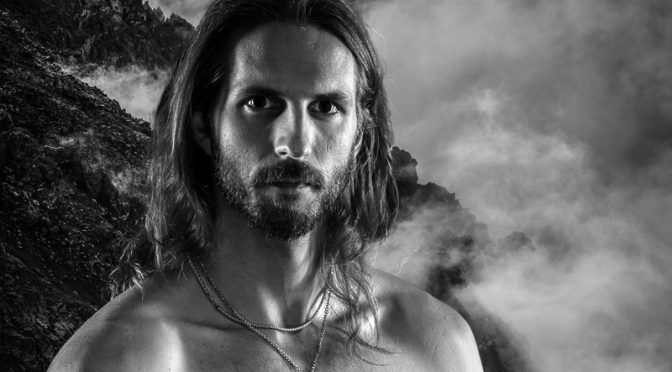
I have always found dramatic lighting particularly appealing.  

Pushing the dramatic lighting techniques further, I love the interplay of light and shadow.

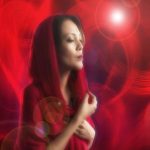
Or this example goes even further into the realm of “dramatic” to add a sense of mystery.

 Don’t be afraid to try different unusual concepts. Try something unusual, just to make a statement that as an artist, you don’t have to be “normal.”

Try different software tools. For the image below, I used Topaz Glow to add a bit of “surreal” to the image.

In this image, shot in my studio, I added a bit of “fog” at the  bottom using Adobe Photoshop.  I use Photoshop all the time and am very proficient with it.  I urge all photographers to really get to know  Photoshop very well!

This image below is a “composite” image created from two different photographs, using Photoshop. I find projects like this to be so much fun!
And here are couple more examples of “composite” photo editing.

The image below was shot in my studio, with the specific intention to then use Photoshop to put in a different background.

Here’s the final result.

This image was also shot in studio with specific attention to light angles, highlights and shadows, with the intent to replace the background using Photoshop.

And here’s the final result.

SO, the bottom line in all of this is that you will benefit so much if you take the time to learn your camera, lighting, and photo editing skills.

The less you know, the more barriers you are going to encounter, where you just can’t get the shot you want.

I offer a wide range of classes throughout the year.   Check out my currently offered classes but also note that on my web page where I list all my classes, if there is a class that is not currently offered, but you’d LIKE me to add it soon, just contact me.  I am happy to add any class if I have at least 3 students interested!  Plus I also offer private teaching options for an individual or a small group (you and a few of your photographer friends).

For the basics, I offer Photography 101 or the Photographers Weekend Boot Camp.

Especially take note that I am thinking about adding another Light & Photography class soon. I think every photographer would benefit from taking this class. If you are interested, go to that web page and let me know what works best for you (weekday daytime or evening) or weekend!

Happy Picture Taking and Never Stop Learning and Try New Things!

Kevin Gourley

P.S.  Check out this FREE EVENT on January 9th: 
Learn More About Our Rocky Mountain Photography Workshops

+ Drawings for FREE PRIZES and future class discountsMust RSVP to attend!

Share

A Halloween Idea – Free Halloween Photos in Your Neighborhood

Hi photographer friends!

I wanted to put this idea out there.  How about offering free Halloween photos for your trick-or-treaters in your neighborhood!  I did this for a few years in my neighborhood and we had a blast!   It was so much fun!

It’s a good idea to get parental permission for this, so keep that in mind.  I just obtained their contact info and then provided their free photos on the web a couple of days later.  I also did a costume contest as well where people could vote on the best costume. Come up with your own fun ideas to make this even more memorable!

Halloween is such a fun time for kids.  Why not offer your photographic skills to help families remember those fun times?

Beyond Halloween, there are all kinds of ways you can use your photography to make a difference in the community. Here are a few ideas (click here), but know the opportunities are all around you! Be creative!

I believe community involvement is a great way to improve our community! Here are various organizations I have donated my time to over the years (click here).

I hope you have a happy and fun Halloween!

Kevin Gourley

Share

Photographing Fireworks

Hey gang!  I love photographing fireworks! I thought I’d share a few tips that will help you get better fireworks photos.

First, a shameless plug:  Want to learn more about photography?
CHECK OUT MY UPCOMING CLASSES! 😉

Now, about fireworks photography…

The two most important rules are:

  1. Be safe
    If you are working with your own fireworks, safety is of utmost importance. You sure don’t want to spend your evening in the emergency room, or watching a firetruck putting out the fire on your roof.  I am sure you know this already. 🙂
  2. Have fun
    Photographing fireworks is a lot of fun. I just had to list this as the #2 important rule because safety simply has to come first!

Do I Need to State the Obvious? Well, maybe. 🙂

Make sure your memory card has plenty of room for the photographs you are going to take, and make sure your battery is fully charged.  The last thing you want to have to mess with is fumbling around in the dark in your camera bag for a spare battery or memory card once the fireworks show is under way!  You DO have a spare battery and memory card, don’t you?? 😉

Think About Placement Ahead of Time

When you are going to photograph a fireworks show, think about the location you are choosing for doing the photography.

    • Think about where the fireworks will go off
    • What’s framing your photos?
    • Pay attention to any distracting lights (streetlight?) that might be in the photos once nightfall arrives
    • Pay attention to distractions along the horizon
    • Think about how horizontal / vertical oriented shots will look at that location
    • Remember, shooting into an Eastern sky will generally be darker than shooting into a Western sky since fireworks shows typically start right after sunset.
    • Once you have lots of people there to watch the show, will there be people in front of you possibly blocking your view?
    • Which way is the wind blowing?  For example will the wind blow the fireworks smoke toward you?  If so, that means you will be photographing through the smoke!  Think about that when setting up.
    • The first fireworks have less smoke, but it might become more of an issue the longer the fireworks show goes on, and depending on your vantage point and wind speed.

Use a Tripod

You simply must use a tripod when photographing fireworks! Use a good stable tripod that is not at all wobbly, and make sure you do not touch or bump the tripod while you are photographing.  If you do, there will be a wobble in the fireworks streaks.

You might be enjoying the music of John Philip Sousa, but whatever you do, don’t start tapping your feet on the leg of the tripod while listening to “The Stars and Stripes Forever” as you photograph the fireworks!!  😉

Also, if you happen to be shooting from a wooden deck, be careful!! If your tripod is on a wooden deck, every little vibration will get transferred to the tripod, then to the camera, and it will cause little “wiggles” in the streaking lights in the photos.

A Flashlight Comes in Handy

Having a small flashlight or even the flashlight on a smart phone can be really handy so you can see the buttons on your camera.

Camera Settings

Most fireworks photography involves using time exposures with your camera mounted on a tripod.  Here are the general settings you can use.

  • Tripod: Like I said above, make sure the camera is on a tripod!
  • Exposure Mode: Use Manual Exposure Mode
  • Focus: Switch the lens to Manual Focus and focus the lens on infinity (and double-check this often, because it is easy to bump your lens focus ring and get the shot out of focus). Auto focus simply will NOT work for fireworks photography!
  • Lens Focal Length:  I find most of my shots are in the 24mm to 100mm focal length range (on a full frame sensor camera).
    • If you have a camera with a smaller sensor, for example an APS-C sensor, take into account your sensor’s “crop factor”.
    • If you don’t know what any of that means, just shoot more wider-angle shots, and judge how much you zoom in based on the shots you are getting.  Try some telephoto (“zoomed in”) shots also!
    • Make sure you take into account leaving enough room for high-rising fireworks.
  • ISO: Stick with your lowest ISO settings like 100 or 200
  • Aperture:  I have found most fireworks photos work well with an Aperture value set to between f/8 and f/22.
    • The more you open the aperture (lower f/number) the brighter the fireworks are
    • The more you close down the aperture (higher f/number) the darker and richer the colors are in the fireworks
  • Shutter Speed:  Usually 2.5 – 20 seconds is fine
    • Or you could use Bulb Mode to indefinitely open the shutter while the shutter released button is pressed.  I tend to prefer just picking a shutter speed.
    • What is different from normal photography is how the shutter speed affects the fireworks photographs.  Normally, if you open the shutter for longer times, the image gets brighter.  It is different when you are photographing moving streaks of light.
      • Slower shutter speeds cause the streaks of light to be longer
      • Faster shutter speeds cause the streaks of light to be shorter
  • Triggering the Shutter:  Exercise caution in causing any wobble from pressing the shutter release button because that wobble will be recorded in the photograph as the streaks of light will be wiggled.  You can avoid this by:
    • Use a remote shutter release (wireless or wired), OR you can
    • Set the camera shutter on a 2 second delay. That way you can press the shutter release button and then take your hands OFF the camera until it has finished taking the photograph.
  • Long Exposure Noise Reduction: Your camera has a feature called Long Exposure Noise Reduction.  While it IS useful for reducing digital “noise” (graininess) in longer exposure shots, it can be a bit frustrating when photographing fireworks.  The camera will do its long exposure noise reduction process in proportion to the length of time of the photograph. So, if you take a 20 second photograph, once the exposure is complete, it will take another 20 seconds to do the noise reduction.  That means your camera is busy doing image processing and is not available to take another photograph until it is done. Since fireworks shows only last for a short period of time, you might consider turning off the Long Exposure Noise Reduction and just apply noise reduction on your computer (for example in Adobe Lightroom).
  • Pay attention to the results you are getting and make adjustments as needed!  If the photos are too bright, close down the aperture (higher f/number).  If you want the streaks of light to be longer, shift to slower shutter speeds.

Note how changing the aperture value changes the brightness of the fireworks, but the lengths of the streaks of light are about the same because the shutter speeds are the same:

fireworks photography


Note how changing the shutter speed changes the lengths of the streaks of light:

fireworks photography


fireworks photography

One more fun thing you can try is Light Painting!

With your camera on a tripod and the shutter speed set to 30 seconds, go out in front of the camera and swirl around sparklers and play with “light painting.”  It is so much fun!

fireworks light painting

Now, go out there and have fun!  And remember, BE SAFE!

Kevin Gourley


© Kevin Gourley Photography, Austin, TX

Share

Want to Improve Your Photography?

Many people think that if they just buy a better camera or lens, their photography will be so much better. And then they go out and make that purchase and are often disappointed.

The real key to better photography is to simply take the time to learn how to use your camera.  Learn the fundamentals really well. Understand the various camera exposure modes. Learn how to manage depth of field and focal lengths and shutter speeds and metering. Take the time to know the camera you have, and only buy a new camera when you know for sure what features the new camera will bring to you. Otherwise, it could be a waste of money.

I offer a wide range of classes as well as private instruction. Let’s work together to develop a plan for how you can be the photographer you’ve always wanted to be.

Share

PPI (Pixels Per Inch) and Image Resolution Myth and Mystery

I have discovered the majority of photographers and people in the graphics world really don’t quite comprehend the term PPI which stands for “Pixels Per Inch” or sometimes shown as “pixels/inch.”

This is not a new term to me because I have worked in the world of digital imaging and computer graphics for decades.  But I find a lot of people really miss the point about what PPI means and how that relates to image resolution.

First, I should be clear about what a “pixel” is.  The term “pixel” is short for “picture element.” A pixel is a single dot of color in your photograph, which is represented by numeric values of measurement of red, green, and blue light which are the primary colors of light. You can mix varying amounts of red, green, and blue to create any color for that single pixel in the image.

Lots of people talk about “resolution” and “PPI” and confuse the terminology. PPI really has nothing to do with the native image resolution of the digital image you create with your camera.  The image resolution is determined by the sensor recording the image. For example, the Canon EOS 5D Mark IV creates images that are 6720 x 4480 pixels.

If you compare that Canon 5D Mark IV with its 6720 x 4480 pixel images, to a Canon Rebel T3i which creates 5184 x 3456 pixel images, you would see that the T3i creates slightly lower resolution images.

When we are talking about the image resolution created by the cameras, the only thing that matters is the number of pixels (width and height) created by the sensor.   The only time the term “PPI” is relevant is when you choose to print a photograph.  The number of Pixels Per Inch determines how large or small to print the photograph.  The PPI specifies how many pixels are to be printed in each inch. For the sake of simplicity, let’s say we had a sensor that created images that are 1000 pixels wide.  If you printed those images at 100 PPI, the print would be 10 inches wide (100 pixels in every inch, over the span of 10 inches = 1000 pixels).  If you printed that 1000 pixel wide image at 1000 PPI, then it would only print 1 inch wide.

SO, PPI is just really only relevant when we are talking about printing. For most printing purposes either 240 PPI or 300PPI is quite good and sufficient. If you print at any higher PPI,  you would have a hard time discerning the difference.

Lots of people talk about creating digital images that are to be displayed on a computer screen with specifications that the image needs to be 72PPI.  (I see this ALL the time.)   When displaying a digital image on the computer screen, really ALL that matters is the number of pixels in the image.  PPI is really not relevant.  A 1000 pixel wide image displayed on your computer will appear as 1000 pixels wide, regardless of what PPI setting might be embedded in the file  The PPI value is only useful for printing to know how to scale the print.

But where did this spec come from where people claim a digital image needs to be 72PPI for display on a computer?  That just used to be the scale to which images appeared on computers a VERY long time ago, back in the 1980’s because Apple made displays that rendered images on their screens which only had 72 pixels per inch on the screen, and why did they choose 72?  72 divided evenly into the print resolution of their printers at that time which printed 144 dots per inch.  Computer screen resolutions have improved so much since the 1980’s but people still believe this myth that digital images need to be set to 72PPI for display on computers.  That is just not true any more. Even so, the myth persists to this day.

If all this has confused you as well, don’t worry.  You are not stupid.  You are with the majority of people who just don’t quite understand what PPI is and there is so much misinformation out there, it just keeps people totally confused.

Here’s an example I encounter frequently.  Let’s say someone says they need me to provide a high resolution image for some project. Since they specifically are asking for a high resolution image, then I of course need to ask just how “high resolution” do they need.  The response is usually that it just needs to be a 300PPI image.  Actually that response is meaningless, but even so that is virtually ALWAYS the response I get.  They say they just need it to be a 300PPI image. That is NOT a specification for a digital image resolution which would be measured in pixels.  A PPI specification just would say how to print that digital image and how many pixels will print in each inch.  If they say they want a 300PPI image, I could provide them an image that is only 300×300 pixels and if they print it to be one inch x one inch, that would indeed be 300PPI. But, is 300×300 a “high resolution” image? No! Not at all!   So, if you say you need an image that is 300PPI you need to also tell me how large you intend to print that image, in inches, in order for me to know how much resolution the image needs to be.

If you say you want an image that will print at 300PPI and say that you need it to be printed at 20 inches wide, then that would tell me how much resolution that is needed.  300PPI x 20 inches = 6000 pixels. So I would need an image that is at least 6000 pixels wide.  I simply MUST know how you are going to use the image and how big you are wanting to print it. Just telling me a PPI number is really insufficient.

I hope that makes sense.   Lots of people are confused about this, including even people in the graphics design world.

Oh and one more thing. There is another term out there called “DPI” which stands for Dots Per Inch.  People often say “DPI” when they technically mean “PPI”.    The term DPI refers to how many dots are printed by a printer, such as an inkjet printer, in order to print a photograph.  If your printer has maybe 8 color ink cartridges, it splatters microscopic dots of ink to intermix to render the color for every pixel in the image.  So it has to print a lot of colored dots to produce each pixel.  Therefore, your printer prints way more dots per inch than it does pixels per inch.  For example, an Epson XP-620 prints 5760 x 1440 dots per inch.  So when you are printing a photograph at 300 pixels per inch on that printer, horizontally, it is using 5760 tiny dots of color horizontally to render those 300 pixels in that inch.

I hope this helps clarify some of the mystery and myths of PPI and DPI.

Happy Picture Taking!

Kevin Gourley

Share

A Few Photography Tips for the Holidays

As the holidays are quickly approaching, I thought it might be helpful to provide a few photography tips!

  • Think about the memories, activities, and traditions that make the holidays special for you. Photograph those things, not just a group photo. It’s not necessarily the posed photos that will matter the most to you later. Get the spontaneous in-the-moment shots!
  • Get close. Sometimes if you shoot from too far away, the image will be too impersonal. You’ll want to see smiling faces and special memories up close.  Plus, as you get closer, you will be more likely interacting with the person(s) you are photographing and will more likely get genuine smiles.
  • Go low. If you photograph kids, photograph them from down at their level. Rather than standing up and looking down on them, get down on the floor with them!
  • Pets are family too!  Be sure you include photos of your furry family members!
  • Photograph the preparation phases as well.: the setting up the tree, the meal cooking, and all the other parts of the holiday experiences.
  • Make sure your battery is charged and have a spare!! Also spare memory cards will help ensure you don’t miss out on those special moments.
  • If your photos are turning out too yellow in your living room, find your camera’s White Balance setting and switch from Auto White Balance over to the Tungsten or Incandescent (light bulb) setting. Just remember to switch it back to Auto White Balance the rest of the time!
  • Use a higher ISO or Auto ISO for handheld shots, to ensure you don’t get blurry images due to hand movement.
  • If you are photographing Christmas lights or a decorated tree, try shooting with a tripod, and shift the aperture to a higher f/stop like f/16 or f/22. You’ll see the lights have a starburst effect which can be nice.
  • Using a flash often produces harsh unflattering light. If you own a flash that mounts on top of your camera, point the flash toward the ceiling or a wall to bounce the light. It will be softer and way more pleasing and natural looking.
  • Sometimes the best camera might actually be your iPhone / smartphone for some of your photos. Your smart phone camera is more likely to be with you at all times. If you don’t have your camera with you at that special moment you want to remember, you won’t get the shot.

What’s important is not really whether you get the “technically perfect” shot, even though that is a good goal to shoot for.  More than the technical stuff, what will really matter most to you later on are the memories.  The photos will help you remember the stories as memories fade.

I wish you very happy and blessed holidays.

P.S. My book has more tips for creating better photographs! It’s available on Amazon!

Share

That Camera Never Corrected My Mistakes

I learned photography some 40 years ago using a Pentax KX 35mm film SLR camera. By today’s standards, that camera was so VERY simplistic.  No auto focus.  Manual exposure system.  No fancy TTL flash capability.  Being a film camera, you couldn’t just change the ISO from shot to shot. It was pretty “limited” in features.

I was able to create some great images with that camera and many rolls of Kodachrome 64 slide film, but it FORCED me to learn photography in the process. If I messed up, it was pretty unforgiving. I had to learn techniques that would ensure I created great images otherwise I was just wasting film. (And as a college student at the time, I sure couldn’t AFFORD to waste film!)

Reflecting back on my early years in photography, I am realizing just how grateful I am to have learned “back in the years of film.” It really forced me to pay attention to what I was doing, and understand what was really happening inside the camera if I wanted to improve as a photographer. From all those lessons learned, it made me a better photographer.

You don’t really need  a “fancy” camera to create great images.  You need to know how to use the camera you have now.  I encourage you to take the time to really dive into this fun and amazing world of photography, beyond just shooting in one of the many “automatic” modes available today that allow you to create a photograph without even knowing what you are doing.  While that WILL yield good results from time to time, sometimes totally accidentally, if you want to consistently create great images, take the time to learn all the features of your camera as well as the important fundamentals of photography.  That is a much better investment than just going out and buying a new camera.

Happy Picture Taking,

Kevin Gourley

P.S. I offer private instruction in most any photography topic.

Share

Your Journey Into Photography

I was looking through some old photographs recently and I ran across this photo (above) that I took when I was 17 years old. (It’s hard for me to believe that was 42 years ago!)

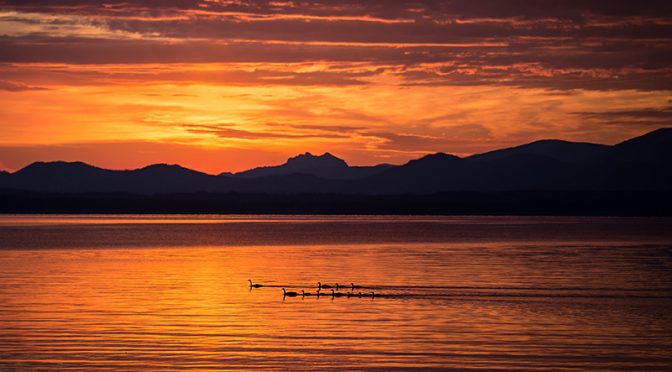
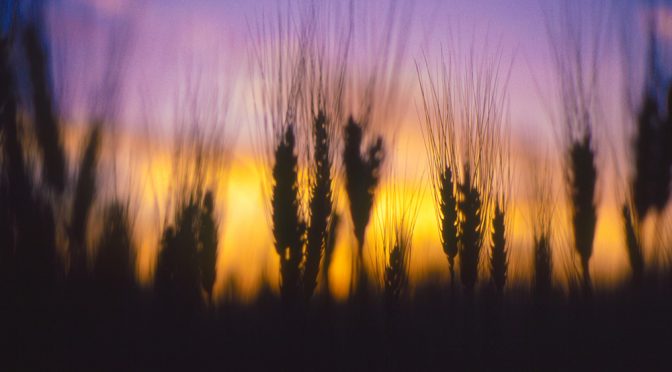
I have loved photography since I was 16, when I started out with a Pentax KX 35mm film camera and several rolls of Kodachrome 64 slide film.  I especially loved sunsets. I loved the colors and the “mood” of the sky as the sun went down.
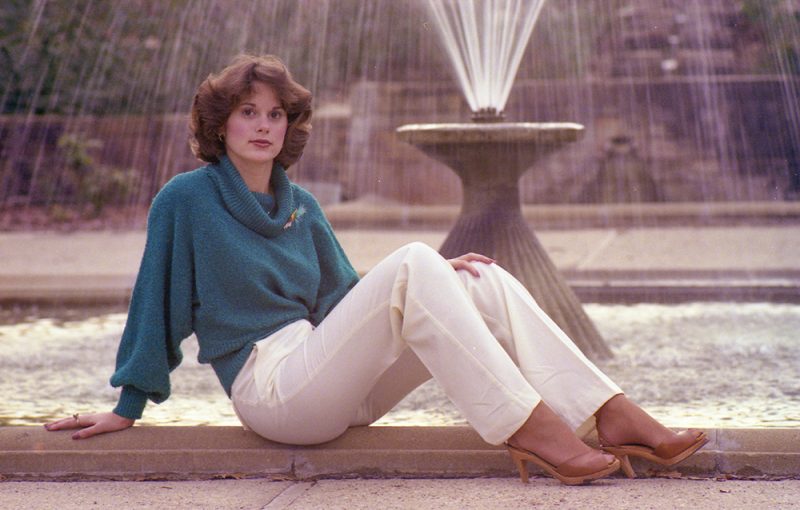
I quickly moved into all aspects of photography, experimenting with nature, landscape, portraiture, studio lighting, color and B&W darkroom work.

I shot this image at the Fort Worth Botanical Gardens, at age 17.

I think it is important for you to try different types of photography. Even try things that you think might not be of interest to you. Explore, experiment, learn, and grow. Get out of your comfort zone and try things that force you to learn new skills.

One piece of advice I give to all photographers is to not just keep doing what you have always done. If you do, you’ll keep getting what you have already gotten. Try new things.  Make mistakes.  Learn from your mistakes, and you will grow as a photographer.

Make it your mission over the next several months to try some type of photography that you have never tried before!

Share

A Little Less Talk, A Lot More Action

I’m stealing a phrase from country-western singer Toby Keith, “A Little Less Talk, A Lot More Action.”  Now that song is totally about a different kind of “action” but let’s put that aside for a moment. 😉

In this case, I am talking about learning photography.  You want to learn photography? Stop just talking about it. Stop just reading about it.  Start DOING photography.  It’s like swimming. You have to do more than just read about swimming, if you want to learn how to swim.  You have to get in the water and get wet.

That’s why the book I recently published, “30 Practical Tips for Better Photographs” includes homework assignments with each section.  Start practicing! Push yourself to be out DOING photography.

I currently have several photography workshops that will really get you into doing some great photography with my help. This gives you a chance to try a variety of fun new things and learn a few new tricks.

So, while you are on Amazon buying my book (not so subtle hint), also register for one of these classes coming up very soon!


Let’s take you to the next level in your photography, with a little less talk and a lot more action! 😉


Share

Why Your Photography Is Not Getting Better

I have encountered so many photographers who are frustrated with their photography.  They want to “move to the next level” and improve their photography, but then they start reading various blogs and ads that convince them the real key is to buy better gear, move to a full frame sensor, better lenses, the most expensive lighting systems, etc.  The next thing you know, they have spent many thousands of dollars and their photography has not improved at all!

Granted, better gear will give you more capabilities, but it may not improve your photography at all.

Beware the temptation to think the problem is your camera gear. I hate to say this, but the problem with your photography might be YOU.  Ouch.  I know I am stepping on some toes when I say that, but I can say that about myself just as easily. My biggest problem with my photography is often ME. If I don’t know how to create the image I want to create, the problem is often with me, not my camera.

A few months ago, I noticed an ad on craigslist for a camera, and the posting said “takes great photos.”  That would be like posting an ad for a paintbrush saying it “paints great paintings.”

The key to creating great art is for the artist to know how to use the tools they are using.

Here are some insights I have discovered:

  • If you are frustrated with your camera, FIRST make sure you take the time to learn how to use it, and know what features it offers. Most modern cameras have all the features you need to create great images. The key is knowing how to use the features, and work around any limitations it might have.
  • Be careful when upgrading to a “better” camera.  It may or may not really improve your photography.  Before you decide on upgrading your camera, know WHY you are upgrading! Were you just attracted to the new camera because of some slick ad that included a photograph you loved and you thought “I want to take pictures like that!”?  That is NOT a good reason to upgrade. You need to know what specific features the new camera has that your current camera does not have. Otherwise, you might be wasting your money.
  • “More megapixels” is frankly not a good reason to upgrade even though thousands of photographers think that will make their photographs so much sharper.  They are often surprised that just having more megapixels doesn’t really improve their image sharpness.  If you want your photos to be sharper, focus on these areas first:
    • Make sure you know how to use your camera’s focus system really well so you can ensure you are getting accurately focused shots
    • Properly manage depth of field through your choice of aperture value
    • Make sure shutter speeds are fast enough to elimination motion blur of the subject or due to camera vibration/movement
    • If you do the above really well, then (and ONLY then) will having more megapixels really matter at all, and still it won’t matter a whole lot to have more megapixels.
  • The real deal about better camera sensors has more to do with better sensitivity in low light (higher ISO capability) and better dynamic range. Pay attention to that more than the number of megapixels.  If you consistently shoot hand-held in low light circumstances then this matters a lot.
  • Push yourself to learn more. Do not get stuck in a rut where you remain in your “comfort zone” always just taking photographs in the same camera mode in the same way.  If you keep doing what you have always done, you will keep getting what you’ve always gotten. Want to do more? Push yourself! Challenge yourself! Try new things. Make mistakes. Then LEARN from your mistakes, and then you will improve! If you are not making mistakes, you are probably not trying hard enough.
  • To avoid getting “stale” in your photography, try different things. If you are always shooting landscapes, try doing something completely different like studio lighting or portraiture or birds or dogs jumping in the water. Try new things. Create new things. You may find a new love of photography as a result.
  • Resist the temptation to think you have to copy what other photographers are doing in order to find acceptance and affirmation. It’s not about getting more “likes” on facebook. Seek to excel at your art as YOUR art. Be the best “YOU” you can be! Be unique. Be creative. The world’s best artists were not just copycats of other people’s work.
  • Be patient and persistent.  Photography is a technical art.  Some of you “get” the technical stuff more quickly than others.  If the technical part is overwhelming, just be patient and keep trying. If you run into problems or questions, you are more than welcome to email me any time with your photography questions.  Oh and then of course, remember I DO teach classes and offer private instruction on almost all photographic topics. 😉

Happy Picture Taking!

Kevin Gourley

P.S. Check out my new book below!

30 Practical Tips for Better Photographs by Kevin Gourley


Share