Category Archives: Photography Tips

12 Inches Behind the Camera

Here’s a famous quote by legendary photographer, Ansel Adams:

“The single most important component of a camera is the 12 inches behind it.”

There is so much truth in this! What matters more than the particular camera features, is the photographer who is using it! You simply must manage the critical setting choices such as aperture, shutter speed, ISO, exposure modes, focusing, depth of field, focal length, white balance, metering modes, etc. The camera can’t make those choices automatically on its own and always get it right. You, as the photographer, must make those choices, based on the artistic intent that only you know. (The camera is not the artist, you are!)

We photographers must make choices that go way beyond camera settings. If we’re shooting portraits, we must bring out the best in the person being photographed, help them feel comfortable in front of the camera, shoot their best angle, manage the best qualities of light, etc.

If you are a nature photographer, you have a wide array of other issues to consider, the weather, sun angle and light qualities, timing, location, wildlife patterns, the flora and fauna at different times of the year, what time you’re getting up in the morning, travel plans, etc.

Yes your choice of camera gear matters, camera features, lens features, tripod quality, and all that, but still these other factors beyond the camera often matter more. Whether you shot the photo with a 20 megapixel camera from 10 years ago, or a brand new 60 megapixel camera will affect various image qualities such as level of digital noise, resolution and fine details, but ultimately the creation of a great image is up to you more than the camera. Whether you shot the image with a Nikon, Canon, Pentax, Sony, Fuji, Olympus, etc. is secondary.

You are that important component that is “12 inches behind the camera.” Upgrade that component, and you’ll get better shots!

Practice, practice, learn, practice some more. Make mistakes, but learn from your mistakes, and you’ll be a better photographer!

Want to know more about the kinds of decisions photographers need to make to create better nature pictures? I have a Nature Essentials Photography Class happening on Tuesday August 25th!

Happy Picture Making!

Kevin Gourley

Share

Q&A: “I just can’t seem to get consistently sharp images”

I hear this from so many photographers! In fact, I’d say this is the #1 issue people encounter. The solution is multi-faceted and I’ll touch on the key factors you, as the photographer, must keep in mind if you want consistently sharp images.

  • Focus
    It is critically important to correctly focus on what is most important in your image. Whether it is an animal or bird in the trees in a wildlife shot, or someone’s eyes in a portrait. All current generation cameras offer automatic focus features, but you’ll need to make sure you really know how to use those features appropriately. A poor setting choice will lead to poor results.
    • WHERE to focus: You may not want the camera to simply automatically decide where to focus. Depending on your camera’s capabilities, that might even lead to terrible results. You might need to choose single point focus which allows you to point at exactly where you want the camera to automatically focus, or if you’re shooting portraits and your camera has an eye-detection feature, you could turn that on. Single point focus is pretty universal across all cameras, and that provides the greatest degree of control when automatic focusing.
    • WHEN to focus: Also, consider whether you want the camera to focus once, or continually focusing up until the shutter fires. For relatively static scenarios where there is not much movement, stick with One-Shot focusing (Canon) or AF-S (Nikon,Sony,…). For active scenes like an animal running or a bird in flight, use AI-Servo (Canon) or AF-C (Nikon,Sony,…)
  • Aperture
    Your choice of aperture value affects the “depth of field” (range that appears in focus). While this is not a focus setting, it is still very important. The higher the f/number, the greater the depth of field. A poor choice for the aperture value could lead to problems with part of the image not being in focus. Let’s say you photograph a group of people. If they are not all the exact same distance from the camera, you need to make sure you choose a high f/number like f/8 or even higher (just depends on how far their distance varies). Photographers often forget about this, and this leads to serious problems.
    • Then there is one more issue related to depth of field and focusing. For higher depth-of-field shots, when you choose a higher f/stop you can also achieve better results by not focusing on the foreground or the background, but instead focus on something in between. This technique is called “hyper-focal focusing.”
  • Shutter Speed
    Sometimes a blurry photograph has nothing to do with a focus or depth of field issue. It might be an issue where the shutter speed was simply too slow to freeze motion of the subject, or freeze any camera vibration that is problematic at slower shutter speeds.
    • Handheld Shots: A general rule of thumb is to keep the shutter speed at least 1 / focal length to ensure you minimize hand vibration blur. So if you are shooting at 200mm, make sure the shutter speeds are at least 1/200th or higher. Technically you would need to take into account your camera’s sensor crop factor that affects the effective focal length of the lens. At least this rule gets you in the ballpark of sufficient shutter speeds. When in doubt, err on the side of faster shutter speeds. It can really make a difference.
    • Action Shots: When there is movement of different elements within a scene, you might need to choose even faster shutter speeds. For example photographing birds in flight or an animal or person running, you might want shutter speeds in the 1/1000th or faster range.
  • Image Stabilization
    This feature, offered by many different camera manufacturers under different names (Image Stabilization, Vibration Reduction, Vibration Compensation, Optical Steady Shot,…), is designed to help eliminate motion blur caused by movement in hand-held shots, allowing you to break that 1 / focal length rule by a bit. The features vary depending on the make and model of camera and lenses you are using, but are quite helpful. I most definitely highly recommend taking advantage of this feature in hand-held photography!
  • Using a Tripod
    Another way you can stabilize your camera is to use a tripod. It won’t eliminate motion blur in moving subject, but at least it will eliminate or reduce blur caused by camera movement. There are still some situations you must be mindful of.
    • When Image Stabilization is a Problem
      Sometimes when your camera is mounted on a tripod that otherwise-wonderful image stabilization feature actual can cause a problem in some scenarios and actually introduce some vibration. So the general rule is to turn off image stabilization when using a tripod. Otherwise it could conceivably introduce a slight amount of motion blur.
    • Unstable Tripod
      There are several ways your tripod might not be as stable as you’d like. Let’s say you have the tripod on a wooden deck, that you are also standing on. You can introduce movement that might cause some motion blur, simply by moving around, so stay very still. Or if you accidentally bump the tripod when shooting, that can cause a problem. Or maybe one of the legs is not latched securely and the leg slides down ever so slowly while you are shooting, that could also cause a problem (hey, I’ve seen it happen).
    • DSLR’s Have Mirrors
      There is one other factor that is more rare but can cause a problem. It’s the mirror inside a DSLR. You mirrorless camera owners don’t have to worry about this. Inside a DSLR, when the shutter fires, the mirror slaps up very quickly to get out of the way, for the shutter to open. That action causes a very tiny amount of vibration right when the shutter fires. Even if you have the tripod on very secure ground, there is always a slight possibility that this tiny vibration can hurt image sharpness. Some DSLR’s support a “mirror lockup” or “mirror up” mode. Check your camera user manual for more information. This usually is only a problem in rare cases where you are using a long lens (400mm+) and a moderately slow shutter speed (1/4th – 1/60th ish).

I know this sounds like a lot to think about, because it is! With practice, this is not really all that hard. I cover these topics in my various Photography Essentials classes and in my book “30 Practical Tips for Better Photographs” available on Amazon.

I hope this helps. Now go out and create those sharp images you’ve been wanting to create!

Kevin

Share

A Caution About “Upgrading” to Mac OS Catalina 10.15.2

An Update on This Article:  Almost two months after Apple released Catalina 10.15.2 (12/10/19) that caused the breakages, they released Catalina 10.15.3 (1/28/2020) which fixed the tethered capture bugs.  The other problem I reported regarding that “Disk Error” message persisted even after updating to 10.15.3.  I never found anyone with an answer to what was causing that, but I discovered on my own that it was a file permissions issue that was somehow introduced with the 10.15.2 upgrade.  I had to modify folder permissions to allow Lightroom and Photoshop to have read and write access to the folder containing the files, even though in earlier versions there was no problems with this.  I am still experiencing intermittent problems with my Mail app since upgrading.  Not sure what the cause is. Very frustrating.

I have a MacBook Pro and recently upgraded to the latest Mac OS Catalina 10.15.2 and have been TOTALLY regretting having done so.  I am hearing from several of my former students that they are also running into problems since upgrading to Catalina 10.15.2.

I have personally encountered several problems that I would categorize as SERIOUS and I hope will be addressed ASAP. 

Here’s what a rep at Adobe says about Catalina upgrades on Mac: “You may want to remain on your current version of macOS until these issues have been resolved.”

For me, it was specifically the upgrade from 10.15.1 to 10.15.2 that started causing the most grief.

  • Strange behavior in my Mac Mail app, intermittently not being able to connect to my mail servers, but then the problem goes away, and then comes back again.  Seem awfully coincidental with having just upgraded the OS.
  • The latest version of Adobe Lightroom Classic CC Version 9.1:
    • Tethered capture connecting via USB to any Canon DSLR (I have 3) simply does not work at ALL any more.  Tethered capture is totally broken.
    • The Edit In Photoshop command when using the “Edit a Copy with Lightroom Adjustments” is totally broken.  Now I just get an error claiming there is a “Disk Error” but there is no problem with my hard drive (after scanning with Disk Utility for problems).  The only time I get this error is when doing this one command from Lightroom.  It simply does not work any more, at all.
    • I have heard from a couple of other people who were having problems opening their catalogs, although I haven’t encountered this problem (yet, at least).
  • Canon EOS Utility (3.11.1 latest version)
    • Tethered capture connecting via USB to any Canon DSLR (I have 3) simply does not work at ALL any more.  Tethered capture is totally broken by any means, whether using Canon’s utility or Adobe’s.
    • Canon tech support says 3.11.1 is compatible with the latest Catalina, but I am experiencing results that are contrary to that.
  • My battery on my MacBook Pro is virtually brand new.  I just replaced it a couple of months ago.  I am noticing the power is draining at a much faster rate than it ever did before.  At the moment, my battery is at 50%, but one hour ago it was at 100%.  Checking to see what app has been the biggest power consumer, it reports Photoshop is the culprit.  BUT I didn’t have this problem until I “upgraded” to Catalina 10.15.2.
    • p.s. 5 minutes have passed since I type this and I am already down to 40%

SO the bottom line is unless you have a very compelling reason you just need to upgrade to Catalina 10.15.2, I’d say DON’T DO IT.  

Some people respond saying they haven’t experienced a problem with Catalina, but I am not sure that is relevant because lots of people ARE experiencing problems like this and if you search, you will find a lot of discussion and frustration over the problems.  So if you upgrade, maybe you’ll be fine, or maybe you will totally regret it.  I am in the latter category.  :-/

I guess I’ll have to look into rolling back my MacOS to a previous version.  That’s a pain also though.  I am hoping Apple will make some fixes to resolve these problems OR I am hoping that Adobe and Canon can put out releases that work around these problems caused by the most recent Catalina release.


p.s. If anyone is curious about my particular model of MacBook Pro, here are the specs: Retina, 15-inch, Late 2013 model,2.6 GHz Quad-Core Intel Core i7, 16 GB 1600 MHz DDR3, Graphics: NVIDIA GeForce GT 750M 2 GB w/Intel Iris Pro 1536 MB; Hard drive: Apple SSD SM1024F

Share

Photography Myth vs Fact – Uncovering the Truth

I have been a photographer for quite a few years, and I have taught photography classes to a wide range of photographers, from beginner to advanced, with almost every camera on the market.

Over the years, I have occasionally discovered various myths photographers sometimes believe and are perpetuated in the photographic community.

I’ve noticed the reason behind the photography myths are varied:

  • They just  “guessed” something to be true and never tested their assumptions.
  • It might have been a standard practice that was relevant back in the old “film” days but is not relevant today.
  • Everybody in their camera club does it this way, but no one knows why.  (“Hey if everybody’s doing it, it can’t possibly be wrong.”) 😉
  • They had an instructor who taught them incorrect information. 
  • They read it in a camera user manual or photography book.

Believe me, this isn’t an exhaustive list. These are just some “off the top of my head” I am writing down on a Saturday morning.  I won’t bother with photograph illustrations of each, but if any of these don’t make sense, just ask and I can add an example.

Uncovering Some Myths I Have Heard… Here are 10:

  1. Myth: Some people are “just not creative.” 
    Truth: Brene Brown said it best:  “There is no such thing as creative and non-creative people, only people who use their creativity and people who don’t.” So don’t give up too soon by believing the myth that you just can’t be creative.  (I have a class that would help.)
  2. Myth: The purpose of Neutral Density Filters is to cut down on glare.  
    Truth: I hear this a LOT from people who were mistakenly told to use an ND filter on bright days to reduce glare. The purpose of Neutral Density Filters is to enable the use of slower shutter speeds.
  3. Myth: Keeping a Polarizing Filter on your lens all the time will make your photographs more colorful.
    Truth: Actually if you adjust a polarizing filter on a per-shot-basis, you might be able to get richer colors in blue skies and eliminate some glare and reflections, BUT you really should not just keep a polarizing filter on your lens all the time. Only use it when you need to. For removing reflections, it is great! For just enhancing the colors in the sky, you can do that easily in post processing without using a polarizer. Negative side effects you’ll get by shooting with a polarizer all the time is slower shutter speed or unnecessarily high ISO values just adding digital noise to all your shots. Only use it when you really need it. Otherwise, take it off!!
  4. Myth: The key to a more perfectly exposed photograph is to have a histogram that is a nice bell-curve in the middle range. 
    Truth: I actually read this in a camera manual, but that is not at all a universal truth. For a dark image, the histogram should have a hump on the left. For a bright image, the histogram should have a hump on the right. For an image that has both bright and dark areas, the histogram might have a hump on the right and left like an inverted bell curve. There is no one “right” histogram for all photos. It depends on each individual shot, and most importantly pay attention to the left and right sides to make sure you are not having the dark areas fall off into blackness (clipping) or bright areas blowing out to pure white.
  5. Myth: You should never use higher ISO values.
    Truth: While higher ISO settings do result in higher digital “noise” (a graininess), keep in mind that modern digital cameras are offering better and higher ISO ranges.  On a camera that goes up to 102,400 ISO, a value of 1600 is not bad and you can always apply noise reduction in post processing. If you have an older camera that only goes up to 3200, though, 1600 is not going to be very good. So it really depends on the camera you are using. Twenty years ago, I had a camera that was terrible at 800. Most modern cameras do much better, and note there is a REASON camera manufacturers are pushing their technology to higher ISO ranges. Higher ISO values allow you to take photographs that were much more difficult in “the old days.”  Higher ISO ranges allow you to ensure the shutter speed is fast enough to freeze action. If you are so afraid of high ISO that you don’t use it, you’ll get motion blur that might ruin the shot, and that is not nearly as fixable as simply applying a little noise reduction. The main point with ISO selection is do not be afraid to use higher ISO when needed, but don’t use it if you don’t need it.
  6. Myth: The best camera exposure mode to use is P (Program) Mode.
    Truth: I noticed a pretty prominent online photography instructor was saying this, and his reason was you don’t have to do any thinking and that the camera chooses the “best” settings for you automatically. That’s just not true.  It has no way of knowing what’s “best.” The fact is, the two most important settings that give you the most creative control in photography is the aperture (which controls depth of field) and shutter speed (which controls the freezing or blurring of motion). Program Mode surrenders those important decisions to the camera which has NO idea what would be the best choice for any shot. So actually it is not the best camera exposure mode at all!  Of the four modes, Manual, Aperture Priority, Shutter Priority, or Program Mode, I’d say Program Mode is the one you should use the least if at all!
  7. Myth: When using a tripod, always make sure to extend the center shaft all the way up before extending the legs, to achieve greater stability.
    Truth: I started hearing this myth coming from various photographers a couple of years ago after a pretty prominent photography instructor at a well-known school was telling his students that. I heard this from multiple sources and was truly baffled. All I can say is that’s just wrong, completely wrong. I am not just a photographer, I have two engineering degrees, and speaking as an engineer, that’s wrong. And just because it was so startling that anyone would make such an erroneous claim about how to best use a tripod, I contacted the well known professional tripod manufacturer, Manfrotto to see what they said. They agreed with me.
  8. Myth: A good hand-held incidental light meter is essential for studio photographers.
    Truth: While it is true that they will give you very accurate information for adjusting lighting and camera settings, their greatest value was back in the “old days” of film where they were pretty necessary.  These days, with digital cameras, you have the ability to simply take a shot and look at the image on the back of your camera and check the histogram and that gives you even more valuable feedback than just a digital display on a light meter. So, I’d say you should save the $500-$600 you might spend on a light meter and instead put that money into quality lighting instead.
  9. Myth: You need a top-of-the-line camera to get the best quality photographs.
    Truth: You need to know how to use the camera you have really well. That matters much more than upgrading to the most expensive camera.  Your choice of camera settings, managing shutter speed and aperture, ISO, etc. is really the key.  I laughed one time when I saw an ad on Craigslist that said: “Camera for Sale – Takes great photographs.” That is like saying “Paint Brush for Sale – Paints great paintings.”  What matters most is how you use the tool you have. You’ll see that some pretty outstanding photographs out there on the Internet were taken with less than top-of-the-line cameras. Granted the higher end cameras may have better features, faster frame rate, more sophisticated auto focus capabilities, more durable, etc.  Still, the real key is you and how you use the camera.
  10. Myth: You need more megapixels to get sharper shots.
    Truth: Unless you are always cropping way in on the photos you have taken, OR you are making extremely large prints, several feet in width, you don’t really need all those extra megapixels in the 50MP and up range. If you make 16×20 prints, you would be hard pressed to even see any difference.  Instead pay more attention to ensuring your shutter speed is fast enough to eliminate any slight blur caused by hand vibration, and use IS/VR to further stabilize, and make sure you manage depth of field and focus carefully. If an image is not sharp, having 61 megapixels to record it won’t help at all. Besides, you’ll be filling your memory cards even faster, and you’ll have higher demands on card speeds since it takes longer to transfer from the camera to the card with large images, and then transferring the images to your computer takes longer, and you’ll fill up your hard drive faster. So you pay a real price for those extra megapixels. I am not saying the high megapixel cameras are useless. There are times when they are the right answer. But most folks simply don’t need them at all.  Oh and one other point about “sharpness.” Sharpness is really more about edge contrast than it is about megapixels.  You could just apply a little sharpening in post-processing your images and people will think you upgraded your camera. 😉

Let me know if you have heard other myths I should add to this list.  I am SURE I have heard others I am just not remembering at the moment.

Happy picture-taking my friends!

Kevin

Share

Tips for Photographing Your Kids Going Back to School!

NOTE: “THANK YOU” Shoutout to KXAN:
Many thanks to Stephanie and Larissa for having me on The CW Austin and KXAN to talk about photographing kids as they go back to school!          See the Video

It’s that time of year again, when kids are heading back to school.  Remember these moments with photographs!  Here are some suggestions that might help!

The most important considerations are not really technical. 

  • You can do this with any camera! Actually a smartphone/iPhone can really help because it is convenient, and allows for more spontaneous capturing of a moment in the midst of getting your child ready for school.  The best camera is the one you have with you when you need it! 
     
  • Try to think about the future, years later, after the kids are grown:  What will you want to remember about this moment with your photographs? Or even beyond that, what will your kids wish you had photographed, years later, after YOU are gone?  Let that inform you as to what to photograph.  Include mom or dad in the photo.  Include the front of your house, or their bedroom, a beloved pet, or their favorite backpack. Maybe have them hold a small sign or chalk board saying what year it is (“Starting First Grade!”, etc.) Get photos of them getting ready, putting things in their backpack, walking down the street to the bus, etc.   Remember you are not just photographing your child.  You are photographing a special moment in time, a context in life that will be ever changing. 
     
  • Change your perspective. See the world from different fun angles, to make a photograph more interesting. Try photographing looking down, or up, or photograph from your child’s eye-level perspective.  If you think about it, if your child is still little, their view of the world and memories may be a different perspective from yours!
     
  • Composition – Think about placement of visual elements in your photos. You don’t have to always put the subject in the center.  There is a popular guideline called the Rule of Thirds, where you divide the scene into thirds and place the key subject at one of those thirds divisions.  (see examples below)
     
  • Get to know your camera’s features beyond just the basics. This allows you to have more creative control. Learn how to choose where your camera focuses, or to lighten or darken the image. Some iPhones have advanced features such as Portrait Mode or Portait Lighting options. Did you know on an iPhone, in the Camera App, the volume up button will cause it to take a photo without having to click on the round circle button on the screen?  That can be really convenient for more spontaneous shots!   The more you take the time to learn how to operate your camera or a smartphone, the better your pictures will be!

You’re telling a story about a time in your life and in your child’s life that you’ll want to remember years later.  Rather than just one photo of them heading out the door, let your photos tell the story.  That story will change as they grow older.

Here are some examples:

Time to Wake Up!

Getting Dressed

Brushing Teeth
Try interesting angles, get the camera down lower to their level.  Even try unusual angles!

Get Your Shoes On!

Time to Brush Hair
Include Mom or Dad in some of the shots!  Years later, your kids will really appreciate this.

Get Your Backpack Ready!
Maybe include some shots with a favorite book or toy.

Framing Up the Shot
Consider using the ‘Rule of Thirds‘ when framing the shot.  Instead of placing your child in the center of the shot, imagine a ‘tic tac toe’ grid dividing the scene into thirds and use those lines as a guide to where you place them in the photo.

The Rule of Thirds says, don’t place them in the center.  So, the photo below is not obeying the Rule of Thirds.

The photo below is more in line with using the Rule of Thirds concept.  This is not an absolute rule!  It is just an alternative that sometimes helps.

All Ready to Go!

Note that most of these shots were all taken at the child’s level.

Leaving!

It’s tempting to just take the photo at the doorway. You might also want to include a shot where you see a bit more of the house. With time, memories fade. Many years later, your child might want to remember what the front of their house looked like.

Dad and Daughter, on their way to school!

HAVE FUN – THIS IS A PHASE OF YOUR LIFE AND YOUR CHILD’S LIFE THAT YOU WILL WANT TO REMEMBER FOREVER!

MY INVITATION TO YOU:

  • I teach photography classes for all skill levels, ages 13 – adult!
  • ALSO photography is actually more than camera features and settings.  It is truly about how we see the world around us!  Something I started about 18 months ago is a group that meets at my studio on Monday nights just to do different book and video discussions and share from our life insights, and we intermittently have some pretty amazing guest speakers.  The topic is actually not specifically “photography.” The topic is life and how we can make our lives better and make the world better!  We’d love to have you join us.  It is ALWAYS TOTALLY FREE TO ATTEND.  The group is called LifeInsights.   Click Here to Learn More and see our current schedule!

P.S. A “THANK YOU” Shoutout to KXAN:
Many thanks to Stephanie and Larissa for having me on The CW Austin and KXAN to talk about photographing kids as they go back to school!  See the Video


– – –

Share

Let’s See Your Wildflower Shots and Locations!

If you have been out photographing the Texas wildflowers, email  with your BEST shots from this year (no more than 3) and please let us know where you found the best wildflowers!

We’ll then post your photos along with the locations you listed so you can help others get their own great shots before wildflower season winds down.


Rebecca Marburger took these shots in the woods in her back yard in Weimar!


Sarah Lieser reports:  There are some pretty flowers around the back roads of Austin and Washington County this year. Also, there are some pretty spots on the back road, Meyersville road, in front of an old white church.


Brandi Pierce reports:  These were taken off of Sam Bass Road in Round Rock.


I spent a little time at Inks Lake State Park on Saturday (3/30/19)  Some of the wildflowers appear to have “peaked” a few days prior. Still was a nice trip. Here are a few random shots. – Kevin Gourley

This final image was looking down on a Bluebonnet and then the image was taken into Topaz Glow for a little post-processing enhancements.

Share

Photography Tips for the Holidays

As the holidays are quickly approaching, I thought it might be helpful to provide a few photography tips!

  • Think about the memories, activities, and traditions that make the holidays special for you. Photograph those things, not just a group photo. It’s not necessarily the posed photos that will matter the most to you later. Get the spontaneous in-the-moment shots!
  • Get close. Sometimes if you shoot from too far away, the image will be too impersonal. You’ll want to see smiling faces and special memories up close.  Plus, as you get closer, you will be more likely interacting with the person(s) you are photographing and will more likely get genuine smiles.
  • Go low. If you photograph kids, photograph them from down at their level. Rather than standing up and looking down on them, get down on the floor with them!
  • Pets are family too!  Be sure you include photos of your furry family members!
  • Photograph the preparation phases as well.: the setting up the tree, the meal cooking, and all the other parts of the holiday experiences.
  • Make sure your battery is charged and have a spare!! Also spare memory cards will help ensure you don’t miss out on those special moments.
  • If your photos are turning out too yellow in your living room, find your camera’s White Balance setting and switch from Auto White Balance over to the Tungsten or Incandescent (light bulb) setting. Just remember to switch it back to Auto White Balance the rest of the time!
  • Use a higher ISO or Auto ISO for handheld shots, to ensure you don’t get blurry images due to hand movement.
  • If you are photographing Christmas lights or a decorated tree, try shooting with a tripod, and shift the aperture to a higher f/stop like f/16 or f/22. You’ll see the lights have a starburst effect which can be nice.
  • Using a flash often produces harsh unflattering light. If you own a flash that mounts on top of your camera, point the flash toward the ceiling or a wall to bounce the light. It will be softer and way more pleasing and natural looking.
  • Sometimes the best camera might actually be your iPhone / smartphone for some of your photos. Your smart phone camera is more likely to be with you at all times. If you don’t have your camera with you at that special moment you want to remember, you won’t get the shot.

What’s important is not really whether you get the “technically perfect” shot, even though that is a good goal to shoot for.  More than the technical stuff, what will really matter most to you later on are the memories.  The photos will help you remember the stories as memories fade.

I wish you very happy and blessed holidays.

Kevin

By the way, my photography classes and private instruction can be given as GIFTS!  This might be the perfect gift for that photographer in your life (or maybe that’s YOU)! 
CLICK HERE TO SEE THE CURRENTLY OFFERED CLASSES

P.S. My book has more tips for creating better photographs! It’s available on Amazon in print and as a Kindle book.

Share

Improving Your Photography Skills

Photography is an art that requires a mix of skills and talent.  It is not just about camera settings or the quality of your camera gear and lenses.  If you want to create better images, it involves truly understanding the fundamentals of photography, how the sensor works (on digital cameras), the aperture, shutter, managing depth of field, freezing or blurring of motion, lens focal lengths, the many various focusing modes, RAW vs JPG, and an array of other factors. But that is just one aspect to consider. 

You also need to consider the importance of LIGHT.  I can’t emphasize this enough. The management of light, quality of light, angle of light, mix of multiple light sources, diffusing it, manipulating it, is all something every photographer must explore and understand.  I promise your photographs will improve if you devote more attention to this.

Then there are factors unique to specific types of photography. For portraiture, posing and interacting with subjects is critical. If you use electronic flash or studio lighting, you must learn the skills to operate these lights effectively.  For landscapes, the understanding of sun angle, and a wide range of other factors are important.  For wildlife, understanding where to find the wildlife and their habits is important.

Oh and there is the study of art and composition!  All of these things are important, in fact essential, in the pursuit of better photography skills.

And then there are all the software tools on your computer to help you manage and organize your thousands of photographs, and edit them to make them “perfect” and print them. All of this work is called “post-processing” and while it is important to create the best image possible in your camera, virtually all images need some degree of post-processing/editing work.  

I offer a wide range of classes to help you take your photography to the next level.   Regardless of whether you are a total beginner or  you have been doing photography for quite a while, I can help you. I also offer private instruction on most any topic.

Check out these classes starting soon!

There are so many ways you can improve your photography. Where do you start? Start from where you are!

Share

Say “Wow” More

Some of you may have heard of Enchroma Glasses. With these special glasses, people with red-green color-blindness can suddenly discriminate between colors they couldn’t see before.  There are a lot of videos posted on youtube of people trying Enchroma Glasses for the first time.  Here is one below.

This blog post is not really just about Enchroma Glasses, though.

I wanted to pose a question to you:  What if you could see the world in a fresh new way, where the seemingly mundane was suddenly amazing, where you were brought to tears by what you saw, where you couldn’t help but say “oh my God” over and over again?   And to think this amazing world was always there, you just could not see it.

Well for color-blindness, there are those special glasses.  But we have other kinds of blindness, where we might not see our world all that clearly simply because we often overlook the things that are most familiar to us. In a sense, we don’t really see what is around us, we see past it, and miss out on so much.

We take so much for granted in life. I wish there were some special glasses I could put on, where suddenly I was saying “wow, oh wow” over and over again. With more appreciation of the beauty that surrounds us, ALL around us, the more we can create stunning images of even the most mundane things. 

Watch for early morning light coming through a window as it caresses a plant with its warmth. Follow a butterfly on its ever-changing path and see where it leads you. Look into the eyes of someone you love… seriously, stop and look at them. Think about what your life would be like if they were no longer here.  Appreciate the world around you more.

If you ever feel uninspired and feel like there is nothing around you to photograph, put on the glasses of “gratitude” and see what you have been missing, overlooking.  Photograph that.  Try to tell a photographic story about your world and what you love.

Say “wow” more.

Share

What Do You See? – The Wisdom of an Owl

I have taught so many photographers over the years. The first photography class I ever taught was right around 40 years ago. While I teach, I also consider myself a perpetual student of photography as well.  My most important advice I can give any photographer is to “remain teachable,” always strive to learn more.

We photographers face an interesting challenge because the images we create are impacted by three distinct factors:

  • The scene – what we are photographing
  • Our eyes – what we see
  • Our camera – the device we use to create the photograph

The Scene – What We Are Photographing

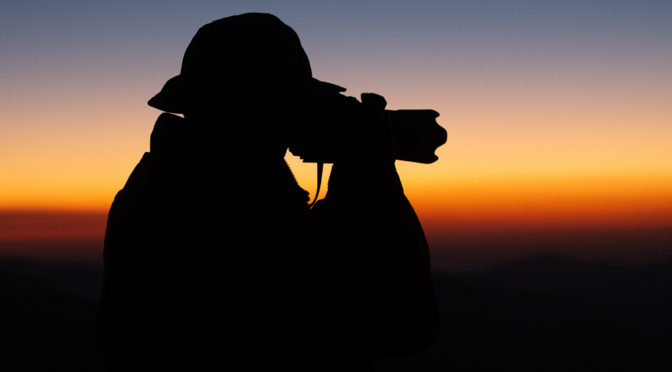
Whether the “scene” is a person (a portrait) or some mountain (landscape), what’s in front of the camera obviously has a direct effect on the images we create. For portraits, we have decisions to make: who to photograph, how to pose them, etc. For landscapes, we choose the time, the location, and so many other factors. The scene is what is out there in front of the camera.  It is not a camera setting. For example, one question every photographer must consider is whether the light is right.

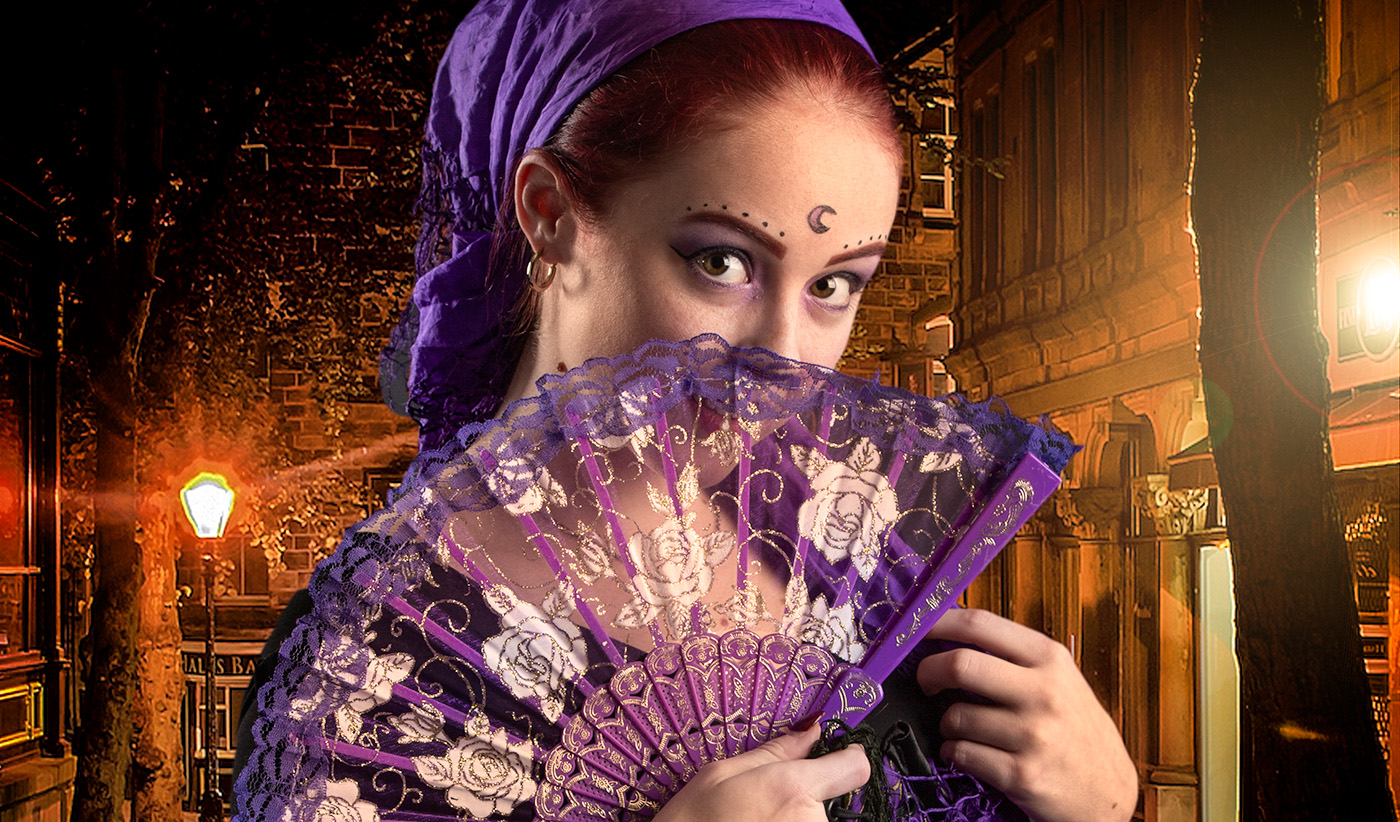
The quality of the light on a scene, whatever the scene, is a critical consideration for all photographers.  For photographs of people, if you know how to manage light, manipulate it, soften it, diffuse it, reflect it, shape it, you can create better portraits.  If you know how to use electronic flashes / speedlights or studio lighting such as monolights, you open the door to better photographs,   Light is critical for all photography, though.  Not just portraits.  That includes mountain landscapes, nature, anything really.

How do you improve the lighting on a mountain?  Come back at a different time of day, or different time of year. The more you take control of choices involving the scene being photographed and the lighting of that scene, the better your photographs will be.   Note I have a class that takes a very comprehensive look at Light & Photography that will ensure you have the skills to manage light more effectively.

Our Eyes – What We See

We don’t necessarily photograph what is there. We photograph what we see.  If we don’t “see” it, we won’t photograph it. Sometimes we miss the perfect shot simply because we did not see it. 

“The owl,” he was saying, “is one of the most curious creatures. A bird that stays awake when the rest of the world sleeps. They can see in the dark. I find that so interesting, to be mired in reality when the rest of the world is dreaming. What does he see and what does he know that the rest of the world is missing?” 
― M.J. Rose

What might you see that the rest of the world is missing? That is actually an intriguing question to ask yourself. In fact, that is an essential question to ask.  Your answer to that question is the key to your distinct view of the world, and is what separates your photographs from any other person’s photographs. I encourage you to spend more time pondering this question and your unique answer. Your photography WILL improve if you do this.

Think about any famous photographer, whose work you admire. Are they really just great because they had a better camera than you?  Not likely.

Our Camera – The Device We Use to Create the Photograph

The camera is the intermediary between your eyes and the world around you. It is the device, though which, you interpret and express your art as you capture images of what you see. 

You can choose to photograph beautiful things, people, and places.  You can choose to add magnificent lighting, but still you have to know how to most effectively use your camera’s many features to create the best images possible.  There is no getting around that.

The fully automatic modes just won’t always deliver the results you envision. Every serious photographer must choose to learn the important fundamentals of photography and the features of their camera if they want to create outstanding photographs. 

Of course I have classes that will help a LOT with that, such as my Photography 101 – Fundamentals of Great Photography class, or my Photographers Weekend Boot Camp.  I also offer Private Instruction on almost all aspects of photography.

Wisdom

Owls are often associated with “wisdom” perhaps going back to the ancient Greek goddess of wisdom, Athena, who had an owl as her symbol. Some say owls came to represent wisdom because of their large eyes and their success in hunting at night and catching creatures that humans weren’t able to detect.

The WISEST steps you, as a photographer, could take are to:

  • Seek out the beauty of the world around you… find those scenes, those places, those moments, those people you find beautiful and photograph them. And I don’t just mean physical beauty.  I mean “beauty” in a deeper sense.  Photograph what you love.
  • Take time to pause and see the world more deeply. If you carelessly rush through life, you might miss out on what really matters.
  • Master your camera skills and light, otherwise you’ll miss so many wonderful opportunities to create your own outstanding images.

What do you see that the rest of the world is missing?  Photograph that, and do it well.

Most sincerely, 
A Perpetual Student of Photography… and Teacher
Kevin Gourley

Share