Tag Archives: photography

A Few Lightroom Edit Examples

We just got back from our Summer Rocky Mountain Photography Workshop!   What a great experience. We had a lot of fun as we went out photographing mountain scenics, waterfalls, wildlife, wildflowers, and sunrises, etc.

I thought I’d post this short video to demonstrate a few post-processing examples using Adobe Lightroom.  If you don’t know what “post processing” means, it just refers to what you do with your photograph AFTER you take the photo. It includes the editing you might do on your computer to improve your photograph.

For this example, I intentionally picked one of the more hazy shots rather than one of my “good shots”, just to demonstrate that you can do a LOT to enhance your photographs in Lightroom. Even if you have a photo that you might have quickly skipped over upon initial review of your shots, you might still find it has potential to be made “better” with just a few simple edits in Lightroom.

Note that all of my photographs were shot in “RAW” mode. Therefore the photographs will initially appear in Lightroom as minimally processed/enhanced images. That is because you are supposed to use Lightroom’s many features to enhance the photo. That is entirely different than when you are shooting in JPG mode. When you shoot in JPG mode, your camera might do all kinds of things to enhance the photo in-camera, especially if you are using options such as the “Landscape” Picture Style (Canon) or Picture Control Setting (Nikon), which dramatically enhances the colors.  With RAW mode, your image file will have substantially more color and brightness information embedded within the file but you are expected to use Lightroom (or other RAW processing program) to make the adjustments and enhancements using software to bring out those colors, enhance shadow details, make white balance adjustments, tone down highlights, etc.

Anyway… on to the video.  I chose an unremarkable shot and demonstrate some Lightroom enhancements to improve the shot.  I hope this helps you!

(Remember you can click on the little link in the lower right corner of the video to bring it up full-screen.)


We’ll be announcing our 2018 Rocky Mountain Photography Workshops very soon!  Our 2017 workshops are totally sold out.  You can click here to learn more about these workshops.

Share

Photographing Fireworks

Hey gang!  I love photographing fireworks! I thought I’d share a few tips that will help you get better fireworks photos.

The two most important rules are:

  1. Be safe
    If you are working with your own fireworks, safety is of utmost importance. You sure don’t want to spend your evening in the emergency room, or watching a firetruck putting out the fire on your roof.  I am sure you know this already. 🙂
  2. Have fun
    Photographing fireworks is a lot of fun. I just had to list this as the #2 important rule because safety simply has to come first!

Reminder: Independence Day Special Offer!
Register for my Photography 101 Workshop by July 4th,
and SAVE $50!

Ok, Now Do I Need to State the Obvious?

Well I guess I’d better.  Make sure your memory card has plenty of room for the photographs you are going to take, and make sure your battery is fully charged.  The last thing you want to have to mess with is fumbling around in the dark in your camera bag for a spare battery or memory card once the fireworks show is under way!  You DO have a spare battery and memory card, don’t you?? 😉

Think About Placement Ahead of Time

When you are going to photograph a fireworks show, think about the location you are choosing for doing the photography.

    • Think about where the fireworks will go off
    • What’s framing your photos?
    • Pay attention to any distracting lights (streetlight?) that might be in the photos once nightfall arrives
    • Pay attention to distractions along the horizon
    • Think about how horizontal / vertical oriented shots will look at that location
    • Remember, shooting into an Eastern sky will generally be darker than shooting into a Western sky since fireworks shows typically start right after sunset.
    • Once you have lots of people there to watch the show, will there be people in front of you possibly blocking your view?
    • Which way is the wind blowing?  For example will the wind blow the fireworks smoke toward you?  If so, that means you will be photographing through the smoke!  Think about that when setting up.
    • The first fireworks have less smoke, but it might become more of an issue the longer the fireworks show goes on, and depending on your vantage point and wind speed.

Use a Tripod

You simply must use a tripod when photographing fireworks! Use a good stable tripod that is not at all wobbly, and make sure you do not touch or bump the tripod while you are photographing.  If you do, there will be a wobble in the fireworks streaks.

You might be enjoying the music of John Philip Sousa, but whatever you do, don’t start tapping your feet on the leg of the tripod while listening to “The Stars and Stripes Forever” as you photograph the fireworks!!  😉

Also, if you happen to be shooting from a wooden deck, be careful!! If your tripod is on a wooden deck, every little vibration will get transferred to the tripod, then to the camera, and it will cause little “wiggles” in the streaking lights in the photos.

A Flashlight Comes in Handy

Having a small flashlight or even the flashlight on a smart phone can be really handy so you can see the buttons on your camera.

Camera Settings

Most fireworks photography involves using time exposures with your camera mounted on a tripod.  Here are the general settings you can use.

  • Tripod: Like I said above, make sure the camera is on a tripod!
  • Exposure Mode: Use Manual Exposure Mode
  • Focus: Switch the lens to Manual Focus and focus the lens on infinity (and double-check this often, because it is easy to bump your lens focus ring and get the shot out of focus). Auto focus simply will NOT work for fireworks photography!
  • Lens Focal Length:  I find most of my shots are in the 24mm to 100mm focal length range (on a full frame sensor camera).
    • If you have a camera with a smaller sensor, for example an APS-C sensor, take into account your sensor’s “crop factor”.
    • If you don’t know what any of that means, just shoot more wider-angle shots, and judge how much you zoom in based on the shots you are getting.  Try some telephoto (“zoomed in”) shots also!
    • Make sure you take into account leaving enough room for high-rising fireworks.
  • ISO: Stick with your lowest ISO settings like 100 or 200
  • Aperture:  I have found most fireworks photos work well with an Aperture value set to between f/8 and f/22.
    • The more you open the aperture (lower f/number) the brighter the fireworks are
    • The more you close down the aperture (higher f/number) the darker and richer the colors are in the fireworks
  • Shutter Speed:  Usually 2.5 – 20 seconds is fine
    • Or you could use Bulb Mode to indefinitely open the shutter while the shutter released button is pressed.  I tend to prefer just picking a shutter speed.
    • What is different from normal photography is how the shutter speed affects the fireworks photographs.  Normally, if you open the shutter for longer times, the image gets brighter.  It is different when you are photographing moving streaks of light.
      • Slower shutter speeds cause the streaks of light to be longer
      • Faster shutter speeds cause the streaks of light to be shorter
  • Triggering the Shutter:  Exercise caution in causing any wobble from pressing the shutter release button because that wobble will be recorded in the photograph as the streaks of light will be wiggled.  You can avoid this by:
    • Use a remote shutter release (wireless or wired), OR you can
    • Set the camera shutter on a 2 second delay. That way you can press the shutter release button and then take your hands OFF the camera until it has finished taking the photograph.
  • Long Exposure Noise Reduction: Your camera has a feature called Long Exposure Noise Reduction.  While it IS useful for reducing digital “noise” (graininess) in longer exposure shots, it can be a bit frustrating when photographing fireworks.  The camera will do its long exposure noise reduction process in proportion to the length of time of the photograph. So, if you take a 20 second photograph, once the exposure is complete, it will take another 20 seconds to do the noise reduction.  That means your camera is busy doing image processing and is not available to take another photograph until it is done. Since fireworks shows only last for a short period of time, you might consider turning off the Long Exposure Noise Reduction and just apply noise reduction on your computer (for example in Adobe Lightroom).
  • Pay attention to the results you are getting and make adjustments as needed!  If the photos are too bright, close down the aperture (higher f/number).  If you want the streaks of light to be longer, shift to slower shutter speeds.

Note how changing the aperture value changes the brightness of the fireworks, but the lengths of the streaks of light are about the same because the shutter speeds are the same:

fireworks photography


Note how changing the shutter speed changes the lengths of the streaks of light:

fireworks photography


fireworks photography

One more fun thing you can try is Light Painting!

With your camera on a tripod and the shutter speed set to 30 seconds, go out in front of the camera and swirl around sparklers and play with “light painting.”  It is so much fun!

fireworks light painting

Now, go out there and have fun!  And remember, BE SAFE!

Kevin Gourley


© Kevin Gourley Photography, Austin, TX

Share

A Series of Moments

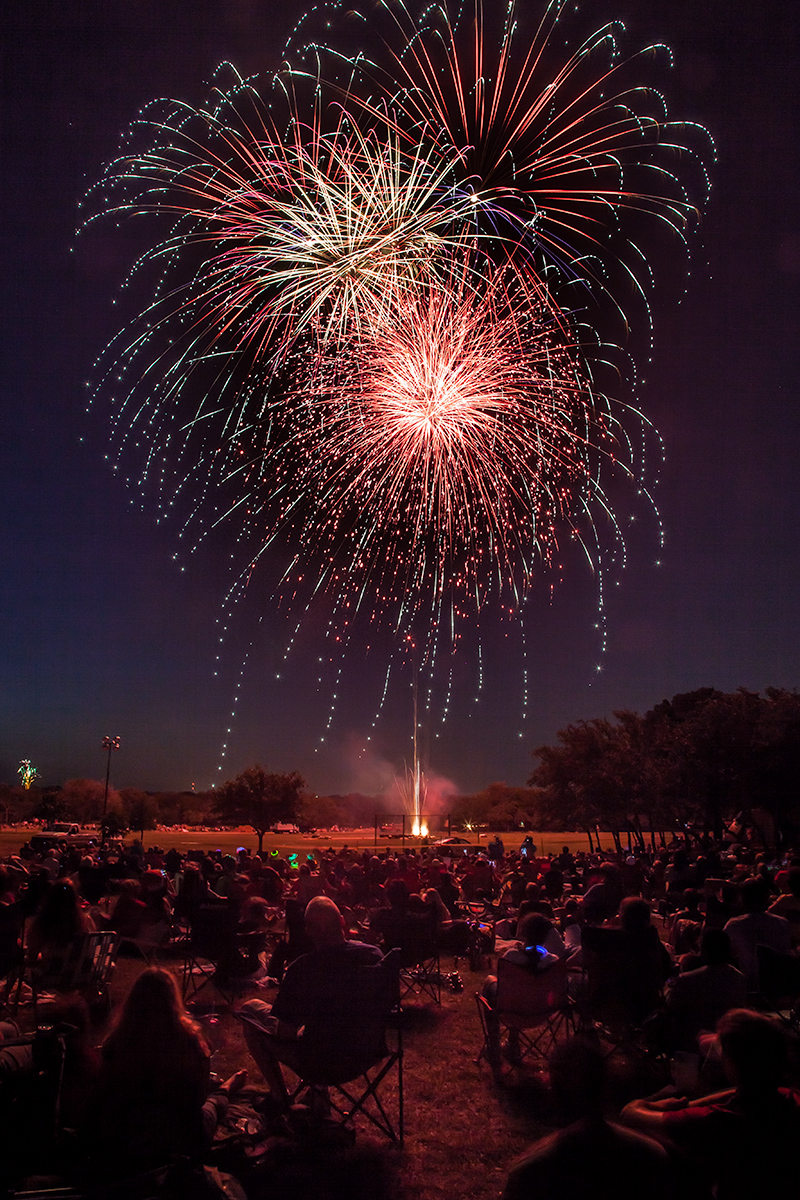
I am grateful for my life.
I am grateful for my family.
I am grateful for my friends.
I am grateful.

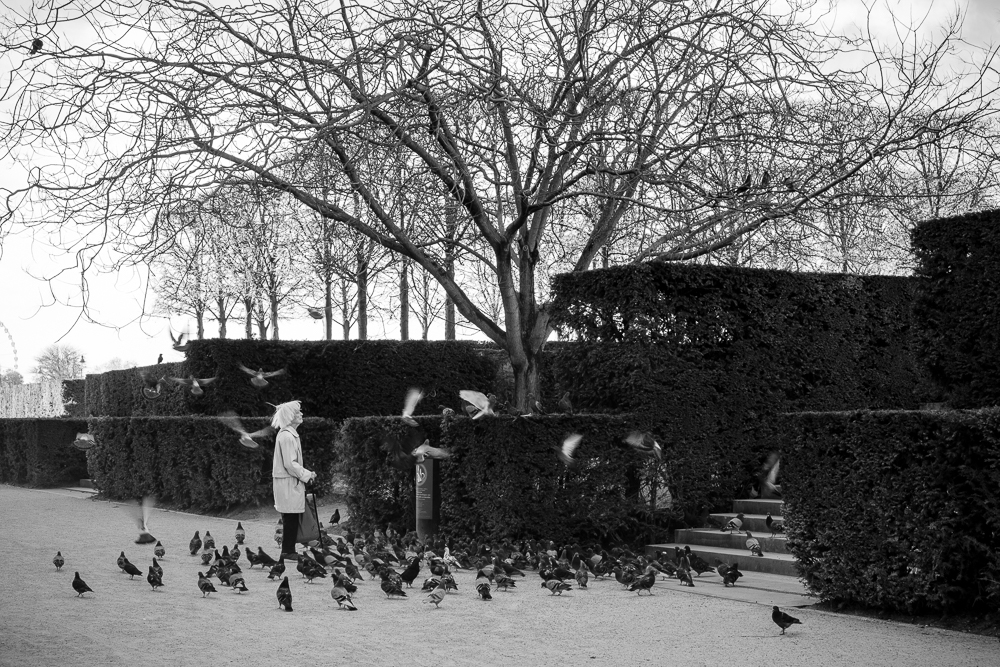
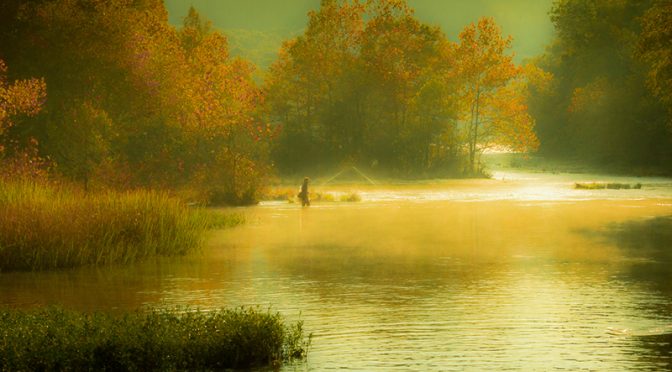
When I reflect back on my life, I really don’t think of it as a continual stream of memories. It’s more like a series of “mental snapshots” of special moments that were life-changing in one way or another; some more significant than others, yet still all important to me.

For some of those occasions, a photograph was taken to remember the moment. For many more, no camera was involved, but I still remember.

Heading Off to College

This is an example of a moment where I happened to have my camera with me.  

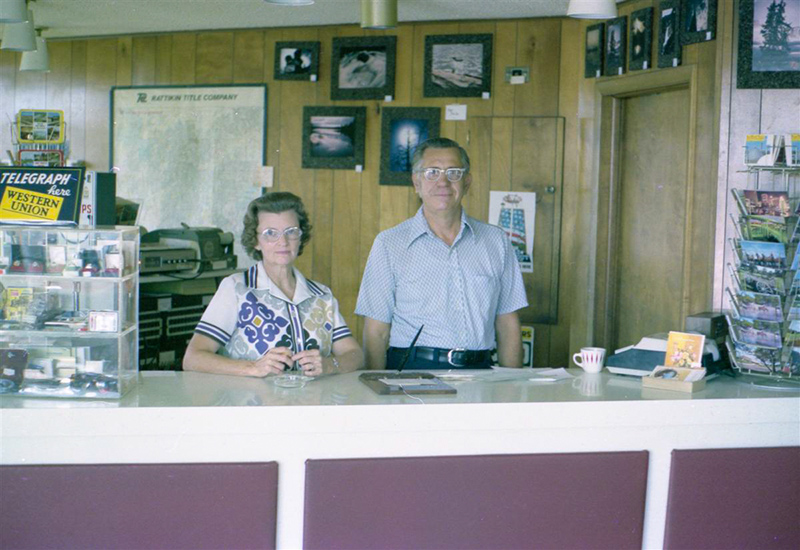
I was 17 years old. I had my Plymouth Duster all packed up and ready head off to college.

After leaving the house, I stopped by to say goodbye to my Mom and Dad who were both still at work.  While I was excited about leaving, I was also a bit nervous about this new life I was entering into. As I said my goodbyes and was walking out the door, I turned and paused, and took a snapshot of them.

I wanted to remember that moment. I then stepped out the door and entered into a new phase of life.  Only now in hindsight, knowing what it is like as a parent to send off my kids to college, I have a deeper understanding of what a major moment it was in my Mom and Dad’s life. I am glad I took this photo. I bet if I had shot a closeup, you would see tears in their eyes.

That Girl I Met

There were countless other major moments where I didn’t have my camera with me.  Like the time I was in college and was making color prints in the darkroom preparing for an upcoming photo contest and this girl named Gail walked in and I said “hi” not realizing she would one day become my wife and mother of my two precious daughters.

A Perspective Shift

And there was the moment where I became a Christian.  Having been an I-don’t-know-what-I-believe person for the first 27 years of my life, this was a major moment in my life. If that doesn’t make sense to you why that would be such a big deal, well, all I can say is I can understand that.  Remember, I was not a Christian for 27 years, and that stuff about Jesus didn’t seem to be big deal to me either… back then.   But to my surprise, it really changed my life for the better in more ways than I can possibly explain in a blog post.  In fact I would say it is a major “defining moment” in my life.

Death

Then my Dad died.  It was my first experience being with someone I love as they died.  That was tough.  No photograph of that moment either, but it is indelibly burned into my memory.

Life (Wow x 2)

Less than two weeks after my Dad died, in a whirlwind of emotions, our first daughter was born. Wow.  Just wow. Another big defining moment.  And then 3 years later we had a 2nd child. Wow, all over again.

I think, of all the experiences in my life, being a “Daddy” to my two precious daughters tops everything. They mean the world to me. Fortunately, I have photographs of many of those special moments. I’d call those “cherished memories.”
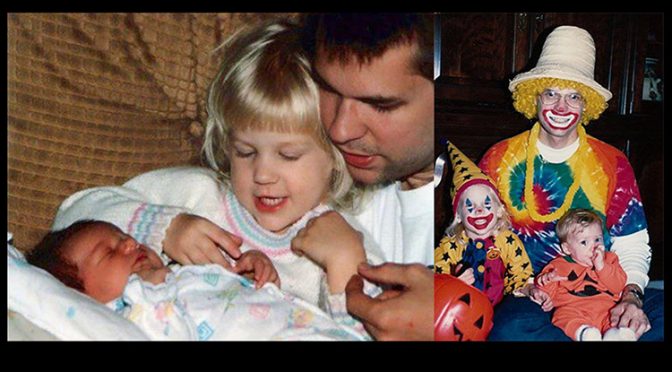
A Clown

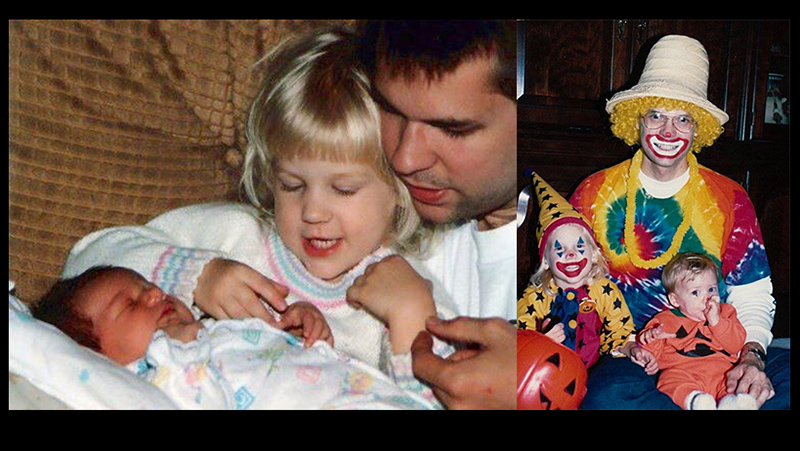
Yes, that’s me, the big clown on the right. I tended to be a bit silly on Halloween. 🙂 Some people might say I am still a big clown.

A Lifetime of Wow Moments

I could go on about so many more moments, but I am not trying to tell my life story here… walking both daughters down the aisle at their weddings, the birth of our grandkids, and so much more I could tell.  More “wow” experiences, most definitely.

We Are Shaped by These Moments

I just want to say how much we each should take an “inventory” of the special moments in our lives, some of them “wow” moments, and realize how those moments have shaped us to be who we are. It explains why we each see the world differently, and maybe we each need to just appreciate and embrace the differences.

I have so many wonderful friends, and I love them just the way they are.  Many of my “mental snapshots” of special moments in my life involve some of you who are reading this. And then, some of you I have not yet met.

Whatever your story is, whatever your life experience is, embrace that which is good in your life, hold onto those memories, and take photographs when you can.

The Most Important Thing About Photography

This is a photography blog.  I wish I could say the most important thing about photography is to impress others about what awesome lighting you have achieved, or how well you do HDR image processing, or your mastery of your Photoshop skills, or how many photography contests you have won. Actually the most important thing about photography is the remembering of the most meaningful moments in your life.

I love you all.

Kevin Gourley

P.S. Every photographer would probably do well to include a quote by Ansel Adams in their writings, so hear ya go:

“A great photograph is a full expression of what one feels about what is being photographed in the deepest sense, and is, thereby, a true expression of what one feels about life in its entirety.” – Ansel Adams

Share

Featured Photographer: Penny Hannan

Your Name: Penny Hannan

Type of Camera: Canon EOS Rebel T3i AND – Galaxy S8

What do you love to photograph the most?
Flowers, skies, pets, family – NATURE #1

What is one thing you have learned that has improved your photography?   ISO…light is everything!  I think 100 ISO is my favorite!!!  OUTSIDE

Advice you’d give to others wanting to grow in their photography skills:  Take a beginning course for a refresh of what’s current and go out and take a lot of pictures – take your camera everywhere and change the settings for fun.

Share

Featured Photographer: Ramona Hovey

Your Name: Ramona Hovey

Type of Camera:  Canon 7D Mark II

What do you love to photograph the most?   Anything related to my travels – building, landscape, and especially people.  I love experiencing cultures and capturing stories through the eye of the lens.

What is one thing you have learned that has improved your photography?   Taking time to observe the world around me and thinking through how to convey those feelings in my photography

Advice you’d give to others wanting to grow in their photography skills: Don’t be afraid to step out of your comfort zone and try new things.  Change up your normal settings, photograph something that isn’t your normal “style”.  And don’t forget to live in the world – not just photograph it!

Share

Featured Photographer: Deborah Cole

Your Name: Deborah (Debby) Cole

Type of Camera:  Nikon D7100

What do you love to photograph the most?   I have married my love of the out of doors with my photography all of my life.  If I could travel somewhere, hike to an out of the way spot and then capture it with my camera (no matter what the equipment!) I was in heaven.  This is still true today.  I am in my “happy place” when I have my hiking boots on, a backpack with lenses and tripod and my trusty Nikon!

What is one thing you have learned that has improved your photography?   What I have learned: to be open to new techniques.  By listening and watching the pros I pick up not only the BIG ideas, but also the little tips and tricks.  Photography is a talent/skill where you never stop learning and experimenting.  I have also learned not to be stingy with my shots.  This is NOT FILM!

Advice you’d give to others wanting to grow in their photography skills:  My advice to others is to travel, travel, travel with the pros.  Or to take classes and workshops with the pros.  Also, follow the pros on instagram or facebook and look at what they shoot.  Then, practice, practice, practice.  Shoot, shoot, shoot.  R&D (rob and duplicate) is OK.  Then listen to your own inner creativity which we all have!

My example is my first night photography.  I have always avoided shooting at night, but I was surprised at how much I enjoyed it.  I shoot not only for the result but for the experience of the shoot.  Shooting at night causes one to slow down even more.  And slowing down and feeling the experience is so essential for me.
My next efforts will be toward shooting people in their natural environment.  Street scenes and capturing the story is something that inspires me.
Share

Featured Photographer: Katherine Malm

Your Name: Katherine Malm

Type of Camera:  Fuji XT2 and Canon 5DMarkIII

What do you love to photograph the most?   I am still drawn to landscape and nature, but these days I prefer to have people and other elements that tell a unique story of the moment. Much of my recent work has been street photography.

What is one thing you have learned that has improved your photography?   Getting the technical aspects of photography and post processing under my belt were key elements in being able to make photographs my own but none of that can ever replace the ability to see and capture a photograph or a moment. I’d much rather see a technically imperfect photo than a boring, same-as-everybody-else shot with perfect technicals.

Advice you’d give to others wanting to grow in their photography skills: Pick up your camera every day. Continue to grow your technical abilities with expert help from people such as Kevin (I always introduce him as my guru!). Get a camera that you love to carry and use but don’t get something new until you’ve truly mastered what you have, whether it’s a body or a lens. See the world as if any moment can be a photograph but only capture what moves you and tells a story of unique or special place, time, event, feeling or emotion.

Share

10 Common Problems Photographers Encounter

Since I have taught so many photography workshops, I’ve seen all kinds of problems photographers regularly encounter.  Some are minor problems, while others are really big deal total show-stoppers! I decided to pull together this list of 10 common problems. Trust me, there are more, but 10 just seems like a good number to discuss for now. 🙂

  1. Shutter speed was not fast enough for a hand-held shot and the result was a photograph that was not sharp.  It looked like it was maybe out of focus, but the real issue was motion blur because you can’t possibly hold the camera still enough to shoot at a slow shutter speed.  This is by far the biggest problem I see photographers encountering.  The solution is simple.   Make sure the shutter speed is fast enough by using this as a guideline:  Keep the shutter speed faster than 1 / focal length of your lens.  (So, if your lens is zoomed to 200mm, make sure your shutter speed is at least 1/200th second.) That is an approximate rule, but it really will make a difference.  If your shutter speeds are not fast enough, shift to a higher ISO and that will allow you to shoot at faster shutter speeds.
  2. Image Stabilizer/Vibration Reduction was not turned on.  If your camera supports this feature, by all means USE IT!  But only use it when you are shooting hand-held. When using a tripod, turn it off (and then the real killer: remembering to turn it back on again when you take the camera off the tripod).
  3. The camera did not focus where YOU wanted it to focus. This is usually because you are trusting the camera’s auto focus system to always make the right decision of where to focus.  You can help it focus on precisely where you want it to focus by changing its configuration to focus on only one focus point instead of having all focus points active (check your manual). Focusing with a single active focus point gives you the ability to always ensure you focused EXACTLY where you wanted to.
  4. As you take a series of photos, you might encounter the brightness of each photo varying wildly from light to dark, even though it is the exact same scene.  Even just small movements of the camera might produce exposures what are way off, sometimes really bright, sometimes dark.  If this is happening, you are most likely shooting in “Spot Metering” mode and don’t realize it.  If you don’t know how to use spot metering, read up on it in your manual, and in the meantime, switch your camera’s metering mode to something more general purpose such as Evaluative Metering on Canon or Matrix Metering on Nikon.
  5. Let’s say you take a photo and it appears at one brightness. Then the next shot of the same scene appears brighter. Then the next shot appears darker. Then the next shot appears normal again, and it seems to keep going through that sequence. If you see that happen, your camera is probably set in a mode called “Auto Exposure Bracketing”. Check your manual to turn it off, if were not intending to exposure bracketing!
  6. Your image appears to be too yellowish/amber when shooting indoors. If that happens, it is most likely because your camera’s Auto White Balance feature just didn’t quite do its job well enough. In that circumstance, you could change the white balance setting over to the light bulb (“tungsten”) setting.  That should clear up the problem.  Remember to set it back to Auto White Balance for your other shots though (or always set the white balance setting to the appropriate lighting option, if you want to always manage it).
  7. You point the camera at a scene and press the button to take the photo but your camera refuses to fire the shutter.  Whenever that happens, it is a problem with the focusing system!  It is trying to prevent you from taking the photo because it can’t figure out where to focus! That usually happens if you are pointing at smooth surface like a smooth wall, or maybe blue sky. It might be because you only have one focus point active, and that point happens to be over an area that is smooth and has no edge details to focus on.  Your camera’s focus system needs to see edges and details to be able to focus (usually).
  8. Your camera may seem to be malfunctioning and not be able to control the aperture of the lens or the focus system. If that happens, make sure the lens is properly mounted on your camera and firmly “clicked” into position, locked onto the camera body.  Also this might happen if the electrical contacts on the lens are a little dirty or corroded.  You might try cleaning then by simply rubbing a pencil eraser on them for a little bit.  Ultra Important: Be careful if you do that, to blow away any of the eraser particles. You do NOT want to get any of those particles inside your camera body!
  9. If you keep seeing soft dots in certain parts of the photograph, especially noticeable in the sky, and they keep appearing in the same positions from shot to shot, you have dust on your sensor. Your camera probably has a built-in sensor cleaning capability which helps some, but it can’t keep all the dust off the sensor. If it is particularly bad, you can send it off to the camera manufacturer to have the sensor cleaned, or some camera stores do this. You can also clean the sensor yourself, but be REALLY careful if you do that. Read up on how to clean your sensor yourself, and make sure you take all precautions to not damage your camera.
  10. If your photographs consistently are turning out to be a little too bright or too dark, and if you are shooting in Aperture Priority, Shutter Priority, or Program Exposure Mode, check to see if you might have inadvertently shifted your camera’s Exposure Compensation setting. If you don’t know where that is on your camera, check your manual!

So there you go.  Those are 10 common problems photographers encounter.

If you haven’t taken any of my workshops, I invite you to do so! We cover a lot of these topics in some of my classes.

Happy Picture Taking (with fewer “oops” moments)!

Kevin Gourley

Share

Featured Photographer: Janis Connell

Your Name: Janis Connell

Type of Camera:  Nikon D7100

What do you love to photograph the most?   I retired from Corporate America in 2014 and am now living my dream of traveling (mostly by RV) and photography. I love being outside and exploring new places and photography is a natural offshoot of that. I have a goal of seeing every US national park before I die. Our national parks are amazing and so are the lesser known monuments and historic sites. In 2016 we visited nine national parks and we were in Great Sand Dunes National Park on August 25, 2016 when the National Park Service turned 100 years old. My goal with photography is to capture a sense of the places I visit so I can share these wonderful places with others.

What is one thing you have learned that has improved your photography?   I think the concepts of composition and design have had the biggest impact on my photography.  I have never considered myself an “artist”, but studying photography has allowed me to explore that part of myself.  Over time, I have gained confidence in my skills and have started exploring my creativity both through photography and mosaic art.  I now find it easier to trust my instincts and see where my creativity will lead me.  Sometimes you just have to start with one small idea and work out from there by trying different angles and perspectives.

What catches your eye?  Start with that.

Advice you’d give to others wanting to grow in their photography skills:  To grow in photography, make sure you have the technical and fundamental composition concepts mastered.  Then go on some photography workshops.  I found my skill level increased dramatically with the first workshop I took (with Kevin Gourley!).  There’s nothing better than spending dedicated time shooting with a professional photographer by your side to help you.  If conditions are not great, you are forced to get creative.  And, you will learn a lot from the other workshop attendees.  So much fun!

Share

Featured Photographer: Barb Harvill

Your Name: Barb Harvill

Type of Camera:  Sony A7R II

What do you love to photograph the most?   I love to photograph nature, landscape and wildlife.  I love to travel and can combine the two. I am currently fascinated by water photography because of the variety of ways you can photograph it.  I recently started playing around with ND filters and long exposure photography.

What is one thing you have learned that has improved your photography?   For me continuing to take lessons that involve hands on practice where I get feedback has done the most to improve my photography. (It’s doesn’t hurt that I get to go to great locations like Kevin’s Rocky Mountain Photography Workshops).  I believe that nothing is better for improving your skills than learning from others in a hands on environment.

Advice you’d give to others wanting to grow in their photography skills:  Other than taking classes and learning from experts – shoot as often as you can and shoot what moves you. For technical skills – You can do this without spending a dime (you already have the equipment). Play around with settings – don’t shoot auto. Take repeat shots of same subject but play around with settings to see the impact of those changes – without worrying about the subject.

For subjects –photograph what you love – I believe that having an emotional response to the subject translates thru your lens. You know when you get that great photograph, and when the right technical settings combine with the right subject… magic happens!

Share